
| Free Download | ||||
|---|---|---|---|---|
 |
||||
|
|
|
Image file | ||
A motorcycle is the epitome of motorized freedom. Drawing it requires care and patience, because a motorcycle is something for advanced draftsmen. However, with this tutorial you can learn to create a cool bike step by step. Use the template for example for a drawing for a birthday or as a cool wall tattoo.
For this you need a pencil, a ruler, a dividers, an eraser, a drawing pencil and suitable colors to your taste.
Welcome to our Motorcycle Drawing Step-by-Step Guide, designed especially for children and beginners who are keen on learning the basics of drawing. In this tutorial, you’ll learn how to sketch a motorcycle using simple shapes and lines, transforming them into a detailed illustration.
Our guide is perfect for budding artists aged 8 and up, offering an engaging and educational experience. With clear instructions and visual aids, you’ll be able to create a realistic motorcycle drawing using basic techniques that build your foundational drawing skills.
By the end of this tutorial, you will have a completed motorcycle drawing that you can proudly display. Let’s grab our pencils and start this creative journey!
What You Will Need
- 2B pencil for initial sketching
- Fine-tip drawing pencil for detailing
- Eraser for removing guide lines
- Colored pencils in black, gray, blue, and red for realistic coloring
- A4 drawing paper for a manageable workspace
- Compass or dividers for drawing perfect circles

Step 1: Important guides
In the first step, we’ll establish the basic guides for our motorcycle drawing. Start by drawing a straight line across your paper using a ruler. This line will serve as the base for the wheels. Use a compass to draw two circles on this line, representing the front and rear wheels. Next, add two more horizontal guide lines at the top and bottom of the wheels. These guides will help ensure your motorcycle is proportioned correctly.
Tip: Make sure the circles are evenly spaced to maintain balance in your drawing.

Step 2: Circles become wheels
Now, let’s refine those circles into wheels. Using the same center points, draw additional concentric circles within each wheel. These will form the rubber tires and brake rotors. Take your time to space these circles evenly, as they are crucial in giving your motorcycle a realistic appearance.
Tip: Keep your pencil strokes light so you can easily erase any mistakes.

Step 3: Silhouette of the motorcycle
With the wheels in place, we can sketch the motorcycle’s silhouette. Start by drawing the suspension forks that connect the wheels to the frame. Then, outline the handlebars, headlights, fuel tank, seat, and frame. This step is all about creating the basic shape of the motorcycle.
Tip: Use long, smooth strokes to avoid jagged lines in your outline.

Step 4: First final contours
Next, we’ll add more definition to the motorcycle by tracing over our previous sketches with a drawing pencil. Focus on the wheels first, refining their shape and adding detail to the suspension forks, handlebars, and headlights. This step is about bringing out the details that will make your motorcycle stand out.
Tip: Press slightly harder with your pencil to make these lines more prominent.

Step 5: Seat, tank and turn signals
Now, it’s time to add the seat, fuel tank, and mudguards. Follow the outline you’ve created and fill in these components using your drawing pencil. Pay attention to the curves and shapes, ensuring they align with your initial sketch.
Tip: Use reference images of real motorcycles to get the proportions just right.

Step 6: Other key components
In this step, we’ll focus on the engine, exhaust, and brake pedal, along with any other missing components. These elements are essential for a realistic motorcycle drawing. Take your time to add intricate details like bolts and lines to make these parts look authentic.
Tip: Use different pencil pressures to create varying line thicknesses for added depth.

Step 7: Removing the guides
With the main drawing complete, it’s time to remove the guides. Carefully erase the initial pencil lines and guides to reveal the clean lines of your motorcycle. This step helps your drawing look polished and professional.
Tip: Use a gentle hand when erasing to avoid smudging your drawing.

Step 8: Coloring
Finally, it’s time to bring your motorcycle to life with color. Use colored pencils to shade the different parts of the motorcycle. Experiment with different shades to create a three-dimensional effect, adding highlights and shadows where necessary.
Tip: Blend colors smoothly to achieve a more realistic look.
More Template Ideas


Your Motorcycle Drawing Is Complete!
Congratulations on completing your motorcycle drawing! You’ve learned valuable techniques that will enhance your artistic skills. We hope you enjoyed this tutorial and feel proud of your creation.
If you’re eager to continue exploring, why not try our other tutorials like drawing cars or bicycles? Keep practicing, and your drawings will keep getting better. Happy drawing!
Tips for an Even Better Motorcycle Drawing
The mechanical character of a motorcycle comes from three details: the two equally-sized wheels spaced just right, the chunky engine block visible between them, and the exhaust pipe sweeping back along the side. Without these, you have a bicycle with a fairing.
Both wheels must be the same size and sit on the same imaginary ground line. The space between them (the wheelbase) varies by style: longer for cruisers, shorter for sportbikes. Always sketch both circles first before drawing anything else.
The engine is the heart of the bike. Draw it as a large block (often roughly trapezoidal or boxed shape) sitting between the wheels, with visible cylinder fins (small horizontal ridges on the engine surface). Even a stylized engine instantly says “motorcycle.” Don’t skip it – an empty space between the wheels makes the bike look like a frame without a soul.
The exhaust pipe is a chrome tube that exits the engine and sweeps backward along the side of the bike, ending in a cylindrical muffler near the rear wheel. Add a small heat-shield band wrapping around it for realism.
The handlebars vary dramatically by bike type. Get them right for the style: low and forward for sportbikes, high and pulled back for cruisers, wide and tall for dirt bikes. The seat position should match – tucked forward over the tank for sportbikes, laid-back for cruisers.
Motorcycle Types: Pick Your Style
The same drawing template adapts beautifully to many motorcycle types:
- Sportbike: Aggressive forward-leaning posture, low handlebars, full fairing covering most of the engine, sleek aerodynamic tail. Think Yamaha R1 or Ducati Panigale.
- Cruiser / Harley-style: Long body, low seat, raised pull-back handlebars, large V-twin engine prominently exposed, thick fenders. Relaxed and chrome-heavy.
- Naked / Streetfighter: No fairing, exposed engine and frame, upright handlebars, single round headlight. Stripped-down and aggressive.
- Adventure / Touring: Tall stance, large fuel tank, knobby tires, panniers (saddle bags) on the sides, big windshield. Built for long trips.
- Dirt bike / Motocross: Knobby off-road tires, high-mounted fenders, narrow seat, no chrome – built for jumping. Often in bright graphics.
- Chopper: Extremely long front fork, small front wheel, raised “ape-hanger” handlebars, low seat. The Easy Rider look.
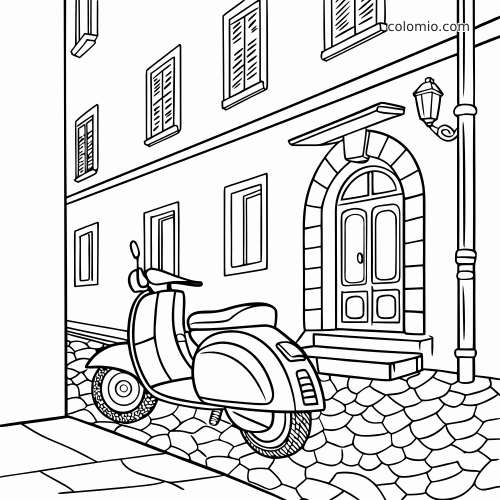
- Vespa / scooter: Step-through frame, small wheels, smooth body panels covering everything, no exposed engine. Italian elegance.
- Café racer: Vintage style, small round headlight, single-seat hump on the rear, low clip-on handlebars, often a striped fuel tank.
- Electric motorcycle: No exhaust pipes, smooth-paneled body, modern design, clean lines. Futuristic.
Adding a Rider
A bike is twice as alive with a rider on it. Quick rider tips:
- Helmet: Full-face for sportbikes, half-helmet for cruisers, open-face goggles for vintage. The helmet shape signals the bike’s style.
- Posture: Sportbike riders crouch forward almost flat over the tank. Cruiser riders sit upright with arms extended forward.
- Hands: Always clearly gripping the handlebars. Show knuckles bent and fingers wrapped around the grips.
- Feet: On the foot pegs – not dangling. The pegs sit at different positions depending on the bike type.
- Jacket: Leather or textile, fitted to the body. Add visible zippers, shoulder padding, and motion folds.
Action Poses & Scene Compositions
- Wheelie: Front wheel lifted high off the ground, rider leaning back. Pure motorcycle joy.
- Cornering / leaning: Bike tilted dramatically into a curve, rider’s knee almost touching the ground. The classic racing pose.
- Burnout: Stationary bike with the back wheel spinning, thick smoke billowing behind. Add motion lines for the spinning wheel.
- Open highway: Bike from a 3/4 rear angle on a long empty road, rider in motion, mountains in the distance. Freedom incarnate.
- Stunt jump: Bike fully airborne over a ramp, rider extended in mid-air. High drama.
- Parked at a diner: Bike on a sidestand outside a small American diner, neon sign glowing, sunset in the background.
- City night ride: Bike streaking through a wet city street, neon reflections on the asphalt, light trails behind.
- Police chase: Two motorcycles in pursuit, dramatic blur lines, urban setting. Action-movie style.
Color Palettes for Different Motorcycles
- Classic Italian sportbike: Bright Ferrari red body, black accents, glossy white number plates, chrome details.
- Black-on-black naked: Matte black everywhere, single neon green or red accent stripe, smoke-grey wheels.
- Cruiser chrome: Deep cherry-red gas tank, abundant chrome (engine, exhaust, fork), brown leather seat, white pinstripes.
- Vintage café racer: British racing green or maroon body, gold pinstripes, brown leather seat, polished aluminum engine.
- Adventure bike: White or yellow body, black accents, blue-grey panniers, beige knobby tires. Built for distance.
- Cyber/futuristic: Glossy black body, electric blue glowing LED accents, gunmetal grey wheels, no chrome.
Common Mistakes to Avoid
1. Wheels of different sizes. Both motorcycle wheels must be the same diameter. Different sizes break the silhouette instantly.
2. Forgetting the engine. An empty space between the wheels makes the bike look like a bicycle. Even a simplified engine block is essential.
3. The exhaust pipe is missing. Even a stylized chrome tube along the lower side instantly says “motorcycle.” Skipping it leaves the bike looking incomplete.
4. The handlebars don’t connect. The handlebars must clearly attach to the front fork via the steering stem. Floating handlebars look broken.
5. The fuel tank is too small. The tank sits between the rider’s knees and is one of the largest visible parts of the bike. A tiny tank looks unrealistic.
6. Forgetting the kickstand. If the bike is parked, it must have a visible kickstand on the left side propping it up at a slight tilt. Without it, the bike looks impossibly balanced.
7. The chain is missing. A simple loop from the front sprocket to the rear wheel sprocket. Without it, the rear wheel has no power source.
Frequently Asked Questions About Drawing a Motorcycle
What type of motorcycle is best for beginners to draw?
A classic cruiser or standard motorcycle is ideal for beginners due to its simpler shapes and proportions.
How can I make my motorcycle drawing look three-dimensional?
Use shading techniques with darker and lighter pencil strokes to create depth and highlight the contours of the motorcycle.
What should I do if my lines are not straight?
Using a ruler or straight edge can help ensure straight lines, especially for the frame and wheels.
How can I improve my drawing skills?
Practice regularly, observe real motorcycles, and study tutorials to understand different components and their shapes.
What colors should I use for a realistic motorcycle drawing?
Common colors include black, gray, blue, and red, but feel free to personalize your motorcycle with your favorite colors.
Take a picture and send it to show@colomio.com – we publish it on www.colomio.com!
All tutorials and images are copyrighted by happycolorz GmbH. Interested in using it? Please send a mail to info@colomio.com.
More ideas for drawing
-

Airplane drawing -

Plane drawing easy -

Apple drawing -

Bicycle drawing -

Ship drawing -

Car drawing -

Car drawing easy -

Cat drawing -

Cow drawing -

Dinosaur drawing -

Dog drawing -

Puppy drawing -

Dragon drawing -

Digger drawing -

Fairy drawing -

Giraffe drawing -

Lion drawing -

Mermaid drawing -

Moon drawing -

Motorcyle drawing -

Penguin drawing -

Pig zeichnen (einfach) -

Princess drawing -

Reindeer drawing -

Rooster drawing -

Santa Claus drawing -

Shark drawing -

Sheep drawing -

Strawberry drawing -

Sunflower drawing -

Tiger drawing -

Tractor drawing -

Train drawing -

Tree drawing -

Tree drawing easy -

Tulip drawing -

Turtle drawing -

Unicorn drawing -

Unicorn drawing easy -

Witch drawing
Print our free printable motorcycle-drawing-step-by-step-guide-with-pictures coloring pages — ready-to-print line art, no signup.
More Crafting Ideas
-

Bee craft -

How to Make a Paper Boat -

How to make an envelope -

Ladybug Craft -

Origami Boat -

Butterfly Craft


