

|
||||
|---|---|---|---|---|
| Free Download | ||||
|
|
|
Image file | ||
A giraffe is a beautiful motif for your own children’s room or also well suited as a nature illustration. The graceful animals exude calm and serenity and with this step by step guide you can easily draw a lifelike giraffe and take on the positive energy for yourself. Use this template for birthday invitations, wall tattoos or picture stories.
For the drawing you need a pencil, an eraser, a drawing pencil and suitable colors according to personal taste.
Welcome to our fun and easy-to-follow giraffe drawing tutorial! This guide is perfect for children and beginners who are eager to learn how to draw this magnificent animal. Using simple shapes and lines, you’ll discover how to create a beautiful giraffe illustration from scratch. Whether you’re a budding artist or just looking for a creative activity, this tutorial is designed to boost your drawing skills.
Our step-by-step guide is suitable for kids aged 5 and up, as well as beginners of all ages. We’ll use basic drawing techniques, starting with simple circles and ovals to outline the giraffe’s form. With practice and patience, you’ll be able to bring your giraffe to life with realistic details and vibrant colors. Let’s get started!
What You Will Need
- HB pencil for sketching the outlines
- 2B pencil for adding details and contours
- Colored pencils in shades of yellow, brown, and black for coloring
- Kneaded eraser for removing guidelines
- Smooth drawing paper, preferably A4 size
- Fine-tip black marker for final outlines

Step 1: Head and muzzle
Begin by drawing the head and muzzle of the giraffe. Use your HB pencil to sketch two circles: one for the head and a smaller one attached to represent the muzzle. Make sure the circles overlap slightly and are placed towards the top of your paper. This will serve as the base for your giraffe’s face.
Tip: Keep the circles light and loose. You’ll refine the shape in later steps.

Step 2: Hull
Next, outline the giraffe’s torso with two larger diagonal ovals. These ovals should be positioned below the head and slightly overlap each other. The first oval represents the upper body, while the second one symbolizes the lower part of the torso. Use your pencil lightly to ensure easy adjustments.
Tip: Check the proportions and distance between the ovals to maintain a balanced giraffe shape.

Step 3: Neck and tail
Now, it’s time to connect the torso, neck, and head with curved lines. Start from the top of the head, drawing down to form the long neck, then curve into the body. Don’t forget to sketch the slight hump over the shoulder blades, which is characteristic of a giraffe’s anatomy. Add a thin, curved line for the tail extending from the lower back oval.
Tip: Use smooth, flowing lines to give your giraffe a natural posture.

Step 4: Limbs
Draw the giraffe’s long, slender legs using your pencil. Each leg should be made up of two straight lines with a small circle at the knee joint for flexibility. Add a slight bend to indicate the joints. At the end of each leg, sketch small, rounded shapes to represent the hooves.
Tip: Check that the legs appear even and balanced, giving your giraffe stable footing.

Step 5: First permanent contours
Switch to a 2B pencil for more defined outlines. Begin by redrawing the head, body, and tail, adding the first layer of details. Pay attention to the proportions, ensuring everything is correctly aligned. Start crafting the features on the giraffe’s head, such as the ears and ossicones (horn-like structures).
Tip: Keep your hand steady to achieve smooth, confident lines.

Step 6: Silence and face
Complete the details on the legs, tail, and face with precise lines using the drawing pencil. Add the short mane running down the neck. At this stage, you can refine the features around the eyes, nose, and mouth, giving your giraffe a friendly expression.
Tip: Remember to maintain symmetry, especially when detailing the face.

Step 7: Removing the guides
Carefully erase the initial pencil sketches and guidelines, leaving only the clean, defined contours of your giraffe. Use a kneaded eraser gently to avoid smudging. This will help your giraffe stand out clearly on the paper, ready for coloring.
Tip: Double-check that all essential lines are dark enough to remain visible after erasing the guides.

Step 8: Coloring
In the final step, bring your giraffe to life with color. Use colored pencils to shade the body in yellow, adding brown patches typical of a giraffe’s coat. Apply black to the mane, hooves, and tail tuft. Experiment with shading to achieve a three-dimensional effect, making your giraffe look more realistic.
Tip: Blend colors gently to create smooth transitions and a natural appearance.
More Template Ideas


Your Giraffe Drawing Is Complete!
Congratulations on completing your giraffe drawing! You’ve successfully followed the steps to create a lively, colorful giraffe illustration. We’re proud of your effort and creativity. Don’t forget to sign and date your artwork!
If you enjoyed this tutorial, be sure to check out our other animal drawing guides, such as how to draw an elephant or a lion. Keep practicing and have fun creating your own animal kingdom!
Tips for an Even Better Giraffe Drawing
The single most distinctive feature of a giraffe is the impossibly long neck, but two other details are nearly as important: the irregular spotted coat pattern and the ossicones (the small horn-like protrusions on top of the head).
The neck should be longer than beginners usually draw – about as long as the entire body from chest to tail. It curves gently at the base where it meets the shoulders, then arches into a graceful S-curve as it rises. Don’t make it perfectly vertical – even a standing giraffe has a slightly forward-leaning neck.
The spots are not random circles. Real giraffe spots are polygonal – jagged, irregular shapes with curved edges that don’t quite touch each other. The space between spots forms thin, river-like lines of cream-colored fur. Don’t draw two spots the same shape or size.
The ossicones are short, blunt, and ALWAYS present (both males and females have them). They’re covered in skin and topped with a small tuft of dark fur. Two on top is standard; some giraffe species have a third smaller ossicone in the middle of the forehead.
The legs are long and slim, but not equally so – the front legs are slightly longer than the back legs, which is what gives the giraffe its distinctive sloping back. The hooves are split (cloven), drawn as a small inverted V at the bottom of each leg.
The eyes deserve special attention. Giraffes have huge, gentle eyes with the longest eyelashes of any land mammal – up to 10 cm long! Always show prominent lashes – they’re a signature feature.
Giraffe Variations
The same body plan works for several real giraffe types:
- Reticulated giraffe: The most photogenic – large, sharp-edged polygonal spots in deep chocolate-brown separated by very clean cream-white lines. Perfect for stylized drawings.
- Masai giraffe: Irregular, jagged, leaf-shaped spots in slightly lighter brown. The most chaotic and natural-looking pattern.
- Rothschild giraffe: Blocky, well-defined spots that fade out below the knees, leaving the lower legs almost pure white. Classic safari look.
- Northern giraffe: Lighter overall coloration with smaller, more rounded spots. Slightly more delicate appearance.
- Baby giraffe (calf): Smaller proportions but already impossibly long-legged. Wobbly stance, oversized eyes, slightly bigger spots relative to body size. Universal cuteness.
- Cartoon giraffe: Round friendly face, oversized smile, big sparkling eyes with huge lashes, bright clean spots. Pure children’s book joy.
- White / albino giraffe: Pure white coat with very faint spots, pink nose and lips. Rare and ethereal.
Pose Variations: Bring Your Giraffe to Life
- Reaching up to a tree: Neck stretched maximally upward, tongue extended (giraffes have a long blue-purple tongue!) toward leaves on a high branch. The signature feeding pose.
- Drinking water (the splay): Front legs splayed wide outward, neck bent down to ground level for water access. Awkward and iconic.
- Walking: Distinctive ambling gait – both legs on the same side move together, creating a swaying motion. Hard to draw without practice.
- Lying down resting: Body folded with legs tucked underneath, neck curved gracefully back so the head can rest on the body or the ground.
- Necking (combat): Two males swinging their necks at each other in a slow-motion duel. Rare to see, dramatic to draw.
- Mother and calf: Adult giraffe with a smaller calf at her side, perhaps reaching up to a low branch together.
- Running (galloping): Body extended horizontally, all four legs bunched and reaching, neck extended forward. Captures the surprising speed of a giraffe.
- Looking over a wall or fence: Only the head and upper neck visible above an obstacle – a great composition for zoo or storybook scenes.
Savanna Scene Compositions
- Acacia tree feeding: Giraffe at a flat-topped acacia tree, neck stretched into the branches, savanna stretching to the horizon behind. Iconic Africa.
- Sunset silhouette: Giraffe in pure black silhouette against an orange-pink sky, distant umbrella-shaped trees. Travel-poster perfect.
- Watering hole: Giraffe drinking with the splay-leg pose, with elephants, zebras, or other animals nearby. Wildlife drama.
- Tower of giraffes (a real word!): A group of 3–5 giraffes together – some grazing, some looking out, some drinking. Adds richness and depth.
- Mother and calf bonding: Two giraffes with their necks crossing at the base, like a heart shape. Emotional and tender.
- Through the tall grass: Only the upper body and neck visible above a sea of golden savanna grass. Atmospheric.
- Zoo scene: Giraffe behind a wooden fence with a child looking up in awe. Childhood memory imagery.
- Storybook giraffe with friends: Cartoon giraffe with elephant, lion, and zebra friends. Pure children’s book joy.
- Giraffe with bird: Oxpecker bird perched on the giraffe’s back or neck, picking insects. Real wildlife symbiosis.
Color Palettes for Giraffes
- Classic reticulated: Deep chocolate-brown spots, cream-yellow base coat, white belly and inner legs, tan-cream tail tuft, dark hooves.
- Sunset-tinted: Spots in warm rust-brown, base coat in golden-yellow with peach undertones, glowing edges. Perfect for dusk scenes.
- Soft Masai: Faded brown leaf-shaped spots, light tan body, cream legs, soft realistic palette. Naturalistic.
- Storybook bright: Pure cartoon yellow body, big rounded chocolate spots, white belly, oversized pink-and-black nose, pink ears.
- Vintage botanical: Sepia-toned spots, parchment-yellow body, faded antique colors. Old encyclopedia look.
- Pastel storybook: Pale cream body, lavender or mint spots (fantasy variation), pink eyelashes, glittery aura. Pure nursery magic.
- Black-and-white sketch: Pure white base, dark grey or black spots, no color elsewhere. Elegant minimalist.
Adding Realism & Personality
Tiny details that lift a giraffe drawing from cartoon to memorable:
- The mane: A short tuft of dark hair running from the top of the head down the back of the neck. Often missed in beginner drawings.
- The tail tuft: Long thin tail ending in a black hair tuft (like a cow’s tail). Use it to suggest movement.
- Ear tufts: Small fluffy patches on each ear, especially noticeable in close-up portraits.
- The blue-purple tongue: Real giraffe tongues are blue-black or dark purple to protect from sun and thorns. Show it for accuracy and surprise factor.
- Long eyelashes: Don’t skip these – they’re iconic. Use long curved lines from the upper eyelid.
- Hoof split detail: A small notch or cleft visible at the bottom of each hoof. Subtle but anatomically correct.
- Two-tone neck: The underside of the neck (throat area) is usually paler than the spotted top. Adds dimension.
- Distinctive walk-stance: Even a standing giraffe is rarely with all four legs perfectly aligned – one leg slightly forward, one slightly back. Add natural asymmetry.
Common Mistakes to Avoid
1. The neck is too short. The single most common giraffe mistake. Make the neck as long as the body itself, minimum.
2. The spots are perfect circles. Real giraffe spots are jagged polygons, not round dots. Forced circular spots make the drawing look like a Dalmatian pattern.
3. Symmetric spot pattern. The left and right sides of a real giraffe have completely different spot patterns. Force-fitting symmetry kills authenticity.
4. Forgetting the ossicones. Both male and female giraffes have ossicones – never skip them. Two on top, possibly a third on the forehead.
5. The legs are too short. Giraffe legs are dramatically long – about as long as the entire body. Stubby legs make the giraffe look like a deer.
6. The back is flat. Real giraffes have a sloping back – higher at the shoulders, lower at the hips. A flat back looks unnatural.
7. The mouth is too big. Giraffe mouths are surprisingly small and gentle-looking – not the wide grin of a horse. Keep the lips understated.
8. Forgetting the eyelashes. Giraffes have unmistakable long lashes. Plain eyes look like a generic herbivore.
9. The tail is too short. Real giraffe tails reach almost to the hocks (the “ankles” on the back legs). Stubby tails look wrong.
Frequently Asked Questions About Drawing a Giraffe
What pencil grade should I use for sketching the initial outlines?
An HB pencil is ideal for sketching the initial outlines because it provides a good balance between lightness and visibility, making it easier to erase later.
How do I draw the giraffe’s distinctive spots?
Use a brown colored pencil to draw irregularly shaped patches on the giraffe’s body. These spots should be randomly distributed and vary in size for a natural look.
What’s the best way to achieve realistic shading?
To achieve realistic shading, layer different shades of yellow and brown with light pressure. Blend the colors smoothly and add shadows where the light naturally falls.
How can I ensure the giraffe’s neck is proportional?
Ensure the neck is about twice the length of the body and draw it with gentle curves that connect the head and torso smoothly. Check your proportions by comparing with the torso length.
What should I do if I make a mistake?
Don’t worry if you make a mistake. Use a kneaded eraser to gently lift the unwanted marks without damaging the paper, then redraw the area.
Take a picture and send it to show@colomio.com – we publish it on www.colomio.com!
All tutorials and images are copyrighted by happycolorz GmbH. Interested in using it? Please send a mail to info@colomio.com.
More ideas for drawing
-

Airplane drawing -

Plane drawing easy -

Apple drawing -

Bicycle drawing -

Ship drawing -

Car drawing -

Car drawing easy -

Cat drawing -

Cow drawing -

Dinosaur drawing -

Dog drawing -

Puppy drawing -

Dragon drawing -

Digger drawing -

Fairy drawing -
Giraffe drawing -

Lion drawing -

Mermaid drawing -

Moon drawing -

Motorcyle drawing -

Penguin drawing -

Pig zeichnen (einfach) -

Princess drawing -

Reindeer drawing -

Rooster drawing -

Santa Claus drawing -

Shark drawing -

Sheep drawing -

Strawberry drawing -

Sunflower drawing -

Tiger drawing -

Tractor drawing -

Train drawing -

Tree drawing -

Tree drawing easy -

Tulip drawing -

Turtle drawing -

Unicorn drawing -

Unicorn drawing easy -

Witch drawing
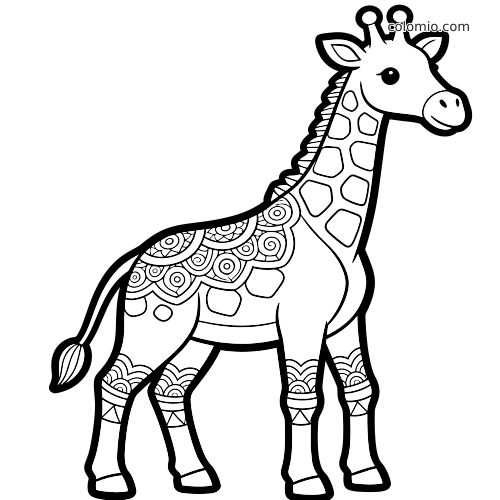
Print our free printable giraffe coloring pages — ready-to-print line art, no signup.
More Crafting Ideas
-

Bee craft -

How to Make a Paper Boat -

How to make an envelope -

Ladybug Craft -

Origami Boat -

Butterfly Craft


