

|
||||
|---|---|---|---|---|
| Free Download | ||||
|
|
|
Image file | ||
The strawberry is loved by most people and is very easy to draw. Just use the following instructions, which will guide you step by step to the finished sweet little fruit. For this drawing you will need a pencil, a black drawing pencil, a red, a yellow and a green colored pencil. Here’s how:
Welcome to our delightful strawberry drawing tutorial, designed specifically for children and beginners. Whether you’re just starting your artistic journey or looking to enhance your drawing skills, this step-by-step guide will help you create a vibrant and lifelike strawberry illustration. With easy-to-follow instructions and visual aids, you’ll learn the fundamental techniques of sketching and coloring.
This tutorial is perfect for young artists ages 8 and up and anyone new to drawing. By focusing on basic shapes and contours, you’ll discover how simple it is to transform an oval into a juicy strawberry. Grab your pencils and let’s get started! By the end of this tutorial, you’ll be proud of your masterpiece and eager to explore more drawing adventures.
What You Will Need
- HB pencil for initial sketching
- 2B pencil for outlining and shading
- Colored pencils in red, green, and yellow
- Eraser for removing auxiliary lines
- Smooth drawing paper or sketchbook

Step 1: Final width of the fruit
Start by drawing an oval shape, slightly tilted, as shown in the picture. This oval will form the main body of your strawberry. Ensure the top center-left of the oval remains open, as this will be where the stem will attach later. Take your time to get a smooth and even shape.
Tip: Use light pencil strokes so you can easily erase or adjust the shape if needed.

Step 2: Basic shape
Next, attach an inverted and slightly rounded cone or a large “V” shape to the bottom of the oval. This will create the distinctive pointed end of the strawberry. Ensure the lines are soft and gentle, as this will help in achieving a more natural look.
Tip: Visualize a heart shape to guide your proportions, making the transition between the oval and cone smooth.

Step 3: Permanent contours and stem
With a black pencil, trace over the contours of your strawberry, except for the lower half of the initial oval, which serves only as an auxiliary guide. Add a stem at the top, using curved lines to give it a realistic appearance.
Tip: Focus on keeping the stem slender, giving it a slight curve for a more organic look.

Step 4: The chalice
Encircle the stem with the characteristic green leaves of the strawberry. These leaves should be drawn in a slightly jagged pattern to mimic the natural shape found on real strawberries.
Tip: Use small, gentle curves and points to form the leaves, giving them a lively and natural appearance.

Step 5: Berry surface
It’s time to add the seeds to your strawberry. Scatter them irregularly across the surface to mimic the natural pattern. To enhance the realism, slightly accentuate the green leaves, giving them subtle veins.
Tip: Keep the seeds small and only lightly shaded to avoid overpowering the strawberry’s red color.

Step 6: Colorize
Now the fun part – coloring! Fill in the strawberry with vibrant red, ensuring an even and bright hue. Color the leaves at the top a rich green and add small yellow dots for the seeds. If everything went well, you’ll have a delicious-looking strawberry that might just make you crave the real thing!
Tip: Blend your red shades slightly for dimension, and use a touch of white to create highlights for extra realism.
More Template Ideas


Your Strawberry Drawing Is Complete!
Congratulations on completing your strawberry drawing! We hope this tutorial has been both fun and educational, helping you develop your artistic skills. You’ve now created a beautiful illustration that showcases your creativity and attention to detail.
If you enjoyed this tutorial, be sure to check out our other drawing guides. From drawing juicy fruits to playful animals, there’s a whole world of art waiting for you to explore. Happy drawing!
Tips for an Even Better Strawberry Drawing
The two details that turn a red blob into a recognizable strawberry are the seed pattern and the green leafy crown (calyx) on top. Get these two right and the rest is just shape and shading.
The seeds are not random dots. Each seed is a small teardrop or oval shape, slightly tilted, set in a tiny dimple. Distribute them evenly across the surface but never in a straight grid – offset every row by half a step, like bricks in a wall. The seeds get smaller and closer together near the tip.
The crown is made of 4 to 6 pointed leaves splaying outward, plus a short green stem at the very top. The leaves should not all be the same length – let one or two arch downward against the body of the strawberry. Add a tiny vertical line down the center of each leaf for the vein.
For the body shape, classic strawberries are heart-shaped – wider at the top, tapering to a soft point at the bottom. The bottom should never be perfectly sharp; round it off slightly.
Strawberry Style Variations
The same basic strawberry can become a dozen different drawings:
- Classic heart-shaped: Wide shoulders, soft pointed tip. The most universally recognized form.
- Round “mushroom” strawberry: Almost perfectly round with a tiny bottom point. Common in cartoon and emoji style.
- Sliced strawberry (cross-section): Vertical cut showing the pale heart pattern inside, with darker red flesh and visible white core. Great for food illustration.
- Bite taken out: A small curved chunk missing from the side, exposing the lighter pink interior. Adds character.
- Wild strawberry: Smaller, more elongated, with seeds protruding outward from the surface rather than sunken in.
- Strawberry character: Add a face on the body of the berry – eyes, smile, blushed cheeks – for kids’ books and food packaging style.
Strawberry Scenes & Compositions
A single strawberry is sweet, but a small composition turns it into a finished piece:
- Strawberries with cream: Two or three strawberries with a soft swirl of whipped cream on top. Classic dessert image.
- Chocolate-dipped: Strawberry held by the leaves, lower half coated in glossy dark chocolate with drips running down. Add a small white highlight on the chocolate.
- Basket of strawberries: A simple woven basket with 6–8 strawberries piled inside, some tilted at different angles. Add a few green leaves between them.
- Strawberry on a vine: Show the strawberry still attached to the plant – a curved green stem with two or three white flowers and one small unripe (white) berry.
- Ice cream sundae: Strawberry sitting on top of a scoop of ice cream with chocolate sauce and a wafer.
- Strawberry pattern (repeat motif): 12 strawberries in three rows for a textile-style pattern. Great for greeting cards and stickers.
Color Palettes That Make Strawberries Pop
The right color choice can take a strawberry from flat to mouth-watering:
- Classic ripe: Bright cherry-red body with deeper red shadows, light pink highlights, yellow seeds, vibrant emerald-green calyx.
- Vintage botanical: Muted brick-red body, brown-tinted seeds, sage-green leaves. Perfect for kitchen art and old-fashioned cards.
- Cartoon/storybook: Pure flat red with no gradient, white seeds (instead of yellow), bright lime calyx, oversized highlight reflection.
- Painterly watercolor: Multiple shades of red and pink blended together, soft edges, seeds left as tiny areas of white paper.
- Unripe (white) strawberry: Pale cream body with light green tint, dark green seeds, deep green calyx. A great rare-look variation.
Common Mistakes to Avoid
1. The seeds are floating dots. Each seed must sit in a small visible dimple. Without dimples, the seeds look painted on the surface, not embedded in it.
2. The crown leaves all point straight up. Real strawberry leaves splay outward in different directions, with at least one or two folding back down across the berry.
3. A perfectly sharp tip. A real strawberry tip is always slightly rounded. A pointed tip looks like a chili pepper.
4. Symmetric placement. Real strawberries are slightly asymmetric – one side a bit wider than the other. Forced symmetry looks plastic.
5. Missing the highlight. A small white reflection (or two) on the upper surface of the berry instantly tells the eye “juicy and shiny.” Without it, the strawberry looks dry.
6. Only one shade of red. Real strawberries have three reds: a darker red in the shadow areas (especially under the leaves), the main red, and a much lighter pink on the highlight side.
Frequently Asked Questions About Drawing a Strawberry
What is the best way to draw the seeds on a strawberry?
To draw the seeds, scatter small, irregularly placed dots across the strawberry. Keep them light and small to maintain the natural look.
How can I make the strawberry look more realistic?
Use shading techniques to add depth, such as darkening the edges and adding highlights with a white pencil for a 3D effect.
What colors should I use for the strawberry?
Use a bright red for the flesh, a vibrant green for the leaves, and a light yellow for the seeds.
How do I draw smooth curves for the strawberry’s shape?
Start with light, gentle pencil strokes, and use your wrist to guide the curve smoothly. Practice makes perfect!
What type of paper is best for drawing with colored pencils?
Smooth drawing paper or a sketchbook is ideal as it allows for even application of color and easy blending.
Take a picture and send it to show@colomio.com – we publish it on www.colomio.com!
All tutorials and images are copyrighted by happycolorz GmbH. Interested in using it? Please send a mail to info@colomio.com.
More ideas for drawing
-

Airplane drawing -

Plane drawing easy -

Apple drawing -

Bicycle drawing -

Ship drawing -

Car drawing -

Car drawing easy -

Cat drawing -

Cow drawing -

Dinosaur drawing -

Dog drawing -

Puppy drawing -

Dragon drawing -

Digger drawing -

Fairy drawing -

Giraffe drawing -

Lion drawing -

Mermaid drawing -

Moon drawing -

Motorcyle drawing -

Penguin drawing -

Pig zeichnen (einfach) -

Princess drawing -

Reindeer drawing -

Rooster drawing -

Santa Claus drawing -

Shark drawing -

Sheep drawing -
Strawberry drawing -

Sunflower drawing -

Tiger drawing -

Tractor drawing -

Train drawing -

Tree drawing -

Tree drawing easy -

Tulip drawing -

Turtle drawing -

Unicorn drawing -

Unicorn drawing easy -

Witch drawing
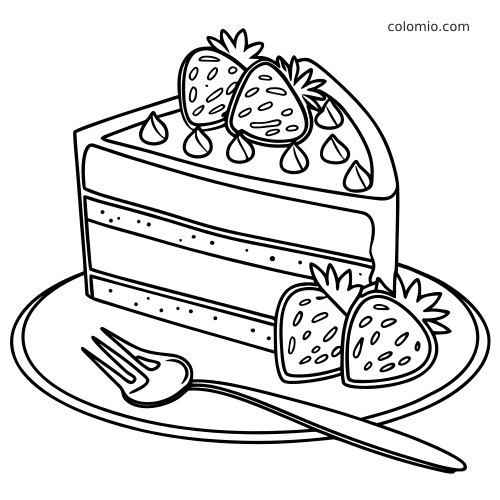
Print our free printable strawberry coloring pages — ready-to-print line art, no signup.
More Crafting Ideas
-

Bee craft -

How to Make a Paper Boat -

How to make an envelope -

Ladybug Craft -

Origami Boat -

Butterfly Craft


