
| Free Download | ||||
|---|---|---|---|---|
 |
||||
|
|
|
Image file | ||
In this tutorial, we will guide you through the magical journey of drawing a charming mermaid. This lesson is perfect for young artists and beginners who are fascinated by the enchanting world of fantasy and the sea.
Our approach will focus on using a combination of basic shapes, such as circles and elongated ovals, to construct the mermaid’s form. This technique simplifies the drawing process, allowing you to create a beautifully proportioned mermaid with ease.
What You Will Need
- HB pencil for sketching the outlines
- 2B pencil for adding depth and shading
- Colored pencils in shades of blue, green, purple, and pink
- An eraser for removing guidelines
- A sharpener to keep your pencils ready
Begin by using your HB pencil to lightly sketch the initial outlines. These guide lines will form the foundation of your drawing. As you progress, you can switch to the 2B pencil to enhance shadows and define contours, creating a more lifelike effect.

Step 1: Head and fish tail
Start by drawing a small circle to represent the mermaid’s head. Below it, sketch a long, curving oval that tapers into a point for the fish tail. The tail should slightly curve to one side, giving a sense of motion.
The circle will help you position the facial features, while the oval guides the flow of the tail. Ensure the tail’s width decreases gradually as it reaches the tip, mimicking a natural taper.
Tip: Keep the head and tail in proportion to maintain a balanced look. The tail should be about twice the length of the head’s diameter.

Step 2: Sharkr, torso and hips
Next, add the torso and hips by drawing an hourglass shape connecting the head to the tail. The upper part should be slightly wider, narrowing towards the waist before widening again for the hips.
This hourglass shape helps to give your mermaid a graceful, flowing silhouette. Adjust the proportions to make the transition between the torso and the tail appear seamless and fluid.

Step 3: Arms
For the arms, draw two slender lines extending from the shoulders. Bend them slightly at the elbows to suggest relaxed, natural poses. Ensure they are proportionate and symmetrical.
The hands can be sketched with simple ovals or circles initially, which you can refine later. The positioning of the arms should complement the overall flow of the mermaid’s body.

Step 4: First final contours
With the main structure in place, trace over your sketch with more defined contours. Focus on smooth, continuous lines to capture the elegance of the mermaid’s figure.
This is your chance to refine the shapes, making them more organic. Pay attention to the lines that define the curves of the tail and torso, ensuring they appear natural.

Step 5: First details like face and hands
Now, add facial features and details like the eyes, nose, and mouth within the head circle. Sketch the hands with fingers extending from the ovals or circles you previously drew.
This step adds personality to your mermaid. Use light, precise strokes for the facial features to ensure they look delicate and expressive.

Step 6: The tail fin
Draw the tail fin by adding two large, flowing shapes to the end of the tail. These should fan out elegantly, enhancing the mermaid’s aquatic nature.
The fin should have a natural, flowing appearance, mimicking the soft, undulating motion of underwater movement. Add gentle curves for a realistic effect.
Important detail: The fin is a key feature that adds character to your mermaid. Consider adding texture lines to suggest scales or movement.

Step 7: Removing the guides
Carefully erase the guide lines using your eraser, leaving only the clean, final outlines. This will help your drawing look polished and professional.
Make sure to erase gently to avoid smudging your final lines. This step prepares your artwork for the next stage—adding color and depth.

Step 8: Coloring
Now, bring your mermaid to life with color! Use shades of blue and green for the tail, blending them to create a shimmering effect. Apply softer colors like pink or purple for the body and hair.
Experiment with different color combinations to find the perfect palette for your mermaid. Use lighter colors for highlights and darker shades for shadows to add dimension.
Important detail: Leave small areas uncolored to represent light reflecting off the scales and skin, enhancing the three-dimensional effect. This will make your mermaid look even more enchanting and vibrant.
Optional Enhancements to Try
- Add a background with waves or seaweed to create an underwater scene.
- Include accessories like a shell necklace or a starfish in her hair.
- Draw tiny fish swimming around the mermaid to add more life to your artwork.
- Use a white gel pen to add sparkle to the mermaid’s tail and create a shimmering effect.
Mermaid Variations: Beyond the Standard Disney Princess
The same body plan adapts to many different mermaid archetypes:
- Classic princess mermaid (Ariel-style): Long flowing red or blonde hair, friendly face with big eyes, green or purple scaled tail, shell bra, oversized smile. The most iconic mermaid look.
- Dark siren / mythological: Long black or silver hair, pale skin, glowing eyes, dark scaled tail (deep purple, navy, or black), gold jewelry. Beautiful but dangerous – the kind that lures sailors.
- Tropical mermaid: Bright colorful scaled tail (turquoise, coral, lime), tropical flowers in the hair, bright fish friends nearby. Caribbean vibes.
- Ice mermaid: Pale blue or white scales, white-blonde hair, crystal-blue eyes, frosty crown of ice. Ethereal and cold.
- Pirate mermaid: Eye patch, gold earrings, sword at the side, tattoos, faded green or maroon tail. Adventurous and fierce.
- Merman: Muscular human upper body with strong arms and shoulders, scaled tail like a mermaid, often with a beard or warrior look. Trident optional but classic.
- Baby mermaid (mer-child): Smaller body with proportionally bigger head and oversized eyes, tiny seashell crown, chubby tail. Universal cuteness.
- Plus-size mermaid: Curvier body, all proportions celebrated, just as beautiful and powerful. Inclusive storytelling.
- Skeletal / undead mermaid: Tattered fins, bone-pale skin, sunken eyes, long stringy hair. Ghost-ship horror style.
- Cartoon mermaid: Round friendly proportions, oversized eyes with sparkles, pastel colors, simple shapes. Pure children’s book joy.
- Goth/Halloween mermaid: Black-and-purple scaled tail, dark lipstick, raven-black hair, silver chain accessories. Atmospheric.
Tail Variations & Scale Patterns
The tail is the most important visual element. A few different approaches:
- Fish tail (classic): Wide flat fan-shaped fin at the bottom, like a goldfish or carp. The most universally recognized mermaid tail.
- Shark tail: Asymmetric tail with the upper lobe larger than the lower – sleek and predatory. Perfect for warrior mermaids.
- Dolphin tail: Horizontal tail flukes (instead of vertical), more whale-like. Smooth and aquatic-mammal in style.
- Seahorse tail: Long, slim, curling spirally at the tip. More delicate than a fish tail.
- Lionfish tail: Long flowing translucent fin rays like decorative ribbons. Dramatic and ornamental.
- Eel tail: Slim, snake-like, no fin at all – just a curving body. Eerie and serpentine.
- Jellyfish tail: The lower body dissolves into flowing translucent tendrils. Surreal and dreamy.
For scales, three approaches work: tiny circular scales (chain-mail texture), large overlapping fish-scale shapes (most common), or a smooth gradient with only a few scales suggested. Don’t cover the entire tail with detailed scales – the eye gets overwhelmed. A few areas of detailed scaling and the rest smooth is more elegant.
Underwater Hair: The Defining Detail
What separates a great mermaid drawing from a generic woman with a tail is the hair behavior underwater:
- Hair should flow upward and to the sides, never hang straight down. The water’s lift makes hair float in directions gravity never allows on land.
- Use long flowing S-curves, never straight lines. Each lock of hair should bend at least twice.
- Add floating wisps and stray strands at the edges – never a clean tidy outline.
- Some hair can cross in front of the face or body, adding depth and movement.
- Show varying thickness – some thick locks, some thin tendrils, some loose strands. Variation reads as natural.
- Add tiny bubbles trapped within the hair for absolute underwater realism.
- Hair color often glows or shimmers more brightly underwater than on land – lean into vivid colors.
Underwater Scenes & Compositions
- On a rock: Mermaid sitting on a rocky outcrop above the waves, hair blowing in the wind, tail dipping into the water. The classic siren pose.
- Coral reef: Mermaid swimming through a brightly colored coral reef with tropical fish nearby, sunlight streaming from above. Vibrant and busy.
- Shipwreck: Mermaid exploring a sunken ship covered in seaweed and barnacles, treasure chest visible. Adventurous.
- Pearl in oyster: Mermaid kneeling beside a giant clam holding a glowing pearl. Mystical and elegant.
- Riding a dolphin or seahorse: Mermaid in motion mounted on a sea creature, hair streaming behind. Action-packed.
- Mermaid lagoon: Multiple mermaids gathered around a pool with a waterfall, lily pads, sunset behind. Group composition.
- Underwater throne: Mermaid queen sitting on a coral or shell throne, jewelry sparkling, school of fish circling around.
- Caught in fishing net: Dramatic scene with mermaid struggling in a net, a sympathetic sailor or hero arriving to free her.
- With sea turtle: Mermaid swimming alongside a sea turtle, hand resting gently on the shell. Peaceful and gentle.
- Singing on the rocks: Mermaid with mouth open, head tilted up, mist swirling around. Maybe distant ships drawn to her song.
- With baby seal or octopus friend: Mermaid playing with a sea creature companion. Heart-melting.
- Storybook with a child: Curious child meeting a friendly mermaid at a tide pool. Pure storybook magic.
Color Palettes for Different Mermaids
- Classic Disney princess: Long red or blonde hair, fair skin, blue or green eyes, vivid teal-green scaled tail, purple shell bra. Disney-bright.
- Tropical paradise: Coral-pink hair with golden highlights, sun-kissed skin, turquoise-and-pink gradient tail, tropical flower in the hair.
- Deep ocean dark: Black or deep midnight-blue hair, pale almost-translucent skin, glowing pale-blue eyes, dark indigo scales fading to black.
- Sunset / coral: Coral-orange hair, golden skin, pink-and-gold tail with shimmer, warm gold accents.
- Ice mermaid: White-blonde hair, ivory skin, pale blue eyes, crystal-blue scaled tail with frost accents, silver crown.
- Storybook pastel: Lavender hair, soft cream skin, big sparkly eyes, baby-blue scaled tail, pink shell bra. Children’s book magic.
- Mythological siren: Long black hair with silver streaks, pale grey-blue skin, glowing yellow-green eyes, dark scales with iridescent sheen. Beautiful and dangerous.
- Vintage 1930s illustration: Long auburn hair, peach skin, sage-green tail with subtle scales, soft sepia tones throughout. Old fairy-tale book aesthetic.
- Goth black: Raven-black hair, pale skin, dark purple lips, deep purple-and-black tail, silver jewelry. Atmospheric and elegant.
Adding Magic & Storytelling
Small touches that bring a mermaid drawing to life:
- Air bubbles trail: Small round bubbles rising from the mermaid’s mouth or hair. Confirms the underwater setting.
- Light rays from above: Diagonal beams of sunlight streaming downward through the water. Adds atmosphere.
- Floating accessories: Pearls, seashells, or sea glass jewelry hanging from the wrists, neck, hair. Suggests wealth and identity.
- Small fish companions: A school of tiny fish circling around or weaving through the hair. Storytelling and movement.
- Glowing scales: A few highlighted scales catching the light, like jewels embedded in the tail.
- Magic sparkles: Small stars or dots emanating from the hands or trailing the tail. Suggests magical powers.
- Seaweed accents: Pieces of long flowing seaweed in the background or wrapped around the body. Adds organic texture.
- Tiny seashells in the hair: A natural crown of small shells woven into the locks.
- Coral crown: A small piece of branching coral worn as a tiara.
- Reflection on the water surface: If the mermaid is half above water, show distorted reflections in the rippling surface.
Common Mistakes to Avoid
1. The tail is too short. A mermaid’s tail should be at least as long as her upper body – ideally longer. A stubby tail looks like a costume.
2. Hair behaves like it’s on land. If the mermaid is underwater, hair MUST flow upward and outward. Hair hanging straight down underwater is the #1 mermaid drawing mistake.
3. The transition from skin to scales is abrupt. The boundary between human skin and the scaled tail should be a gradual fade, with a few scales scattered upward and a few clear skin areas at the top of the tail.
4. Symmetric perfect pose. Real underwater poses are rarely upright and frontal. Add a tilt, twist, or curve to the body for movement.
5. Forgetting the second fin. Most mermaid tails have a fan-shaped fluke at the end PLUS smaller fins along the tail (like a fish’s dorsal or pelvic fins). One small extra fin adds realism.
6. Eyes too small. Mermaid characters benefit from large, expressive eyes. Realistic-sized eyes can look severe.
7. The face is too symmetric. Hair partly across one eye, head tilted, slight asymmetry – these add personality.
8. No background = no story. Even minimal water lines, bubbles, or a shell add context. Pure white background makes the mermaid feel cut out.
Frequently Asked Questions About Drawing a Mermaid
How do I make the mermaid’s face look realistic?
Start with basic shapes like circles for eyes and a small line for the mouth. Gradually refine these shapes, adding details like eyelashes and lips to bring them to life.
What are good color choices for the mermaid’s tail?
You can use vibrant blues and greens to mimic the ocean’s hues. Adding hints of purple can also create a mystical, whimsical effect.
How can I ensure the proportions are correct?
Use light guide lines to map out the basic shapes first. This helps in maintaining balance and ensuring each part of the mermaid is proportionate to the others.
How do I add texture to the mermaid’s tail?
You can draw small, overlapping scales using a light pencil. Gently shade around them to create depth and highlight the texture.
What hairstyles are suitable for a mermaid?
Mermaid hairstyles can be long and wavy to suggest underwater movement. You can also add accessories like shells or pearls to enhance the fantasy element.
How can I make the mermaid’s arms look more natural?
Ensure they are slightly bent at the elbows and have a gentle curve. This creates a relaxed pose that complements the flowing lines of the rest of the body.
Your Mermaid Drawing Is Complete!
Congratulations on finishing your mermaid drawing! You’ve learned how to use basic shapes to construct a complex subject, mastering the art of proportion and fluidity.
Keep exploring your creativity by trying out our other tutorials. Whether it’s mythical creatures or everyday objects, there’s a world of art waiting for you to discover!
More Template Ideas


Take a picture and send it to show@colomio.com – we publish it on www.colomio.com!
All tutorials and images are copyrighted by happycolorz GmbH. Interested in using it? Please send a mail to info@colomio.com.
More ideas for drawing
-

Airplane drawing -

Plane drawing easy -

Apple drawing -

Bicycle drawing -

Ship drawing -

Car drawing -

Car drawing easy -

Cat drawing -

Cow drawing -

Dinosaur drawing -

Dog drawing -

Puppy drawing -

Dragon drawing -

Digger drawing -

Fairy drawing -

Giraffe drawing -

Lion drawing -
Mermaid drawing -

Moon drawing -

Motorcyle drawing -

Penguin drawing -

Pig zeichnen (einfach) -

Princess drawing -

Reindeer drawing -

Rooster drawing -

Santa Claus drawing -

Shark drawing -

Sheep drawing -

Strawberry drawing -

Sunflower drawing -

Tiger drawing -

Tractor drawing -

Train drawing -

Tree drawing -

Tree drawing easy -

Tulip drawing -

Turtle drawing -

Unicorn drawing -

Unicorn drawing easy -

Witch drawing
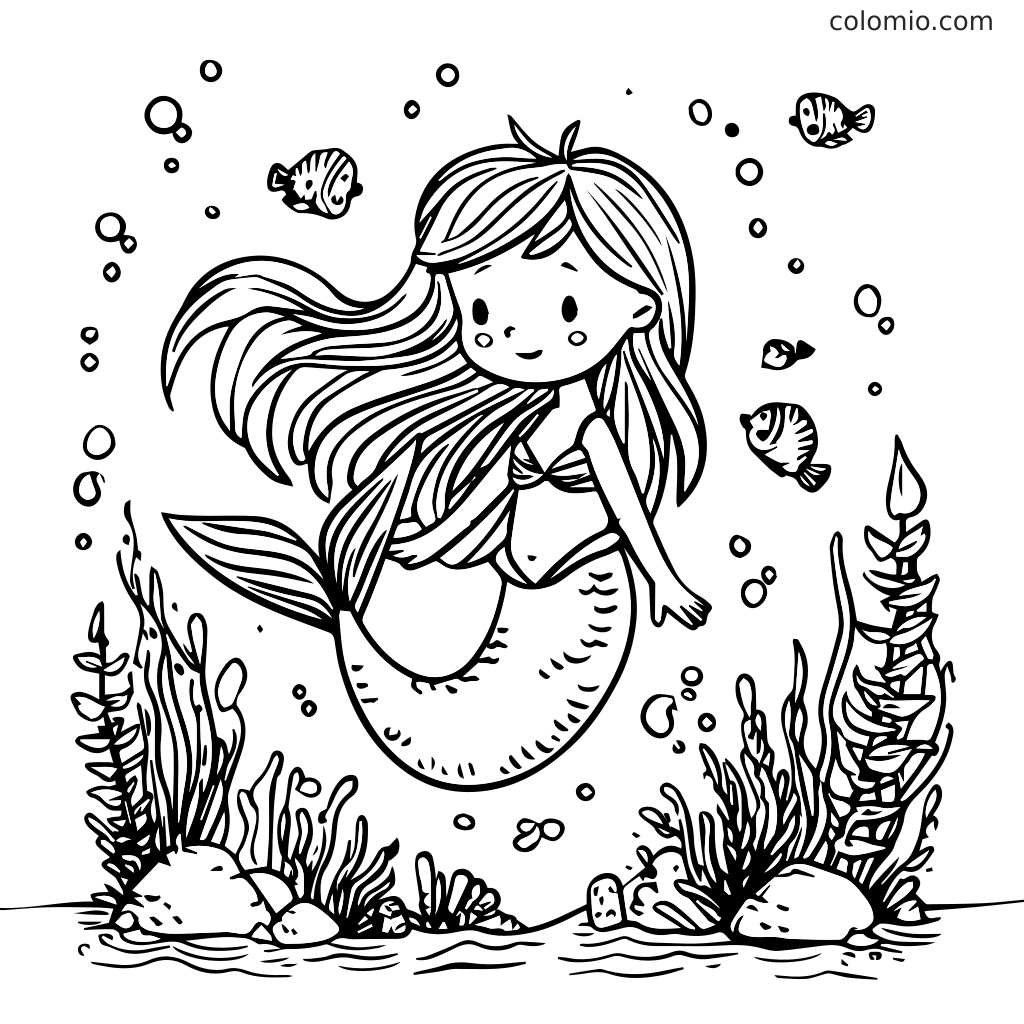
Print our free printable mermaid coloring pages — ready-to-print line art, no signup.
More Crafting Ideas
-

Bee craft -

How to Make a Paper Boat -

How to make an envelope -

Ladybug Craft -

Origami Boat -

Butterfly Craft


