

|
||||
|---|---|---|---|---|
| Free Download | ||||
|
|
|
Image file | ||
Today, we’re diving into the ocean to draw a fierce yet fascinating creature: a shark! This tutorial is perfect for young artists and beginners who are eager to capture the powerful form of one of nature’s most impressive predators.
In this lesson, we’ll use a series of guiding lines and shapes to construct our shark. We’ll focus on creating a dynamic pose by using an auxiliary line as the backbone of our drawing, ensuring proportionality and movement.
What You Will Need
- HB pencil for sketching
- 2B pencil for adding details
- Colored pencils in gray, blue, and white
- An eraser for correcting mistakes
- Quality drawing paper for best results
Begin by using your HB pencil to lightly sketch the guide lines. These will help shape your shark without committing too much to the page. Once you’re satisfied with the outlines, switch to a 2B pencil for defining the details. This layering technique will give your drawing depth and clarity.

Step 1: Auxiliary line
Start by drawing a long, slightly curved auxiliary line across your paper. This will act as the central guide for your shark’s body.
Ensure the curve of the line mimics the natural, streamlined shape of a swimming shark. This will help you maintain the dynamic form of the shark as you build upon it.
Tip: Position the auxiliary line diagonally to suggest movement, making your shark look as if it’s gliding through the water.

Step 2: Hull
Next, sketch a long, narrow oval around the auxiliary line to represent the shark’s hull. This oval should taper slightly at both ends.
The hull is the main body of your shark. It’s crucial to get this shape right, as it will determine the overall bulk and sleekness of the shark’s form.

Step 3: Fins, gills and eyes
Add the dorsal fin at the top, the pectoral fins on the sides, and small, curved lines for gills near the head. Include a small circle for the eye.
Sharks have distinct fins that aid in their powerful swimming. Ensure the dorsal fin is prominent and the gills are evenly spaced to depict a realistic structure.
Important detail: Place the eye slightly forward on the head for an authentic shark appearance.

Step 4: First final contours
Refine the body by drawing the initial contours over your guide lines. These contours should smooth out the hull and define the fins.
This step is about transitioning from rough shapes to a more defined outline. Pay attention to the natural curves and angles of a shark’s body.

Step 5: More fins and mouth and teeth
Add additional fins, including the second dorsal fin and the anal fin. Sketch the mouth, complete with sharp teeth.
Sharks have a menacing set of teeth which can be shown with triangular shapes. Keep the fins proportional to the body for a realistic look.

Step 6: Side line
Draw a horizontal line along the side of the shark’s body to represent the lateral line, a sensory organ.
The lateral line is an important feature that helps sharks detect movement in the water. It should run from the head to the tail, slightly above the midline.

Step 7: Removing the guides
Erase the auxiliary lines gently with your eraser, leaving behind the clean, final shark outline.
This is your chance to perfect the contours and ensure all parts of your shark are accurately represented. A clean outline will make coloring easier.

Step 8: Coloring
Use gray to fill in the shark’s body, adding blue to suggest the glistening water. Leave parts white for highlights, especially on the top.
Vary the pressure on your colored pencils to create a gradient effect, enhancing the three-dimensionality of the shark.
Important detail: Use the white pencil to blend the edges of the gray and blue areas, creating a smooth transition and adding realism to your shark’s appearance.
Optional Enhancements to Try
- Add a shadow beneath the shark using a soft gray to anchor it to the ocean floor.
- Include small fish or coral details in the background to create an underwater scene.
- Draw bubbles around the shark to emphasize its movement through the water.
- Enhance the shark’s eyes with a touch of glossy black for a lifelike sheen.
Tips for an Even Better Shark Drawing
The thing that makes a shark drawing read as a shark and not as a dolphin or a tuna is the silhouette: a torpedo-shaped body, a triangular dorsal fin standing up high on the back, and a clearly forked tail with the upper lobe longer than the lower one. Get the silhouette right and you can almost stop there.
The body should be widest at the front third – right behind the gill slits – and taper smoothly to the tail. Avoid drawing a sausage-shaped body. The underside is flat to slightly convex, while the back has a pronounced rise where the dorsal fin attaches.
The dorsal fin must be tall, sharp, and slightly curved backward at the tip. A short, rounded fin makes the shark look like a goldfish. Place it roughly in the middle of the back, never too far forward.
The mouth is the iconic feature. Position it on the underside of the head (sharks have ventral mouths), curving in a wide arc. Don’t try to draw every individual tooth – six to ten triangular teeth in the upper jaw and a similar number in the lower jaw, in two slightly offset rows, is more than enough. Make the teeth uneven in size for realism.
The eye is small and round, set high on the head, with a black pupil. Some artists add a small white nictitating membrane (the second eyelid) for a chilling effect.
Shark Species to Try
The same body plan adapts beautifully to multiple shark species:
- Great White Shark: Classic torpedo shape, dark grey-blue back, white belly, conical snout with a slight overbite. The most recognizable shark.
- Hammerhead Shark: The body is similar to a regular shark, but the head extends sideways into a wide T-shape with the eyes at the very ends. Striking and unique.
- Tiger Shark: Stockier body with bold dark vertical stripes along the sides (these fade with age – juveniles have the boldest stripes). Blunter snout.
- Bull Shark: Short, blunt snout, thick muscular body, smaller eye relative to head size. Looks intimidating.
- Whale Shark: Massive flat-topped head, wide mouth, body covered in pale blue-grey spots and bars. Despite the size, gentle and friendly.
- Mako Shark: Sleeker, more pointed snout than Great White, deep blue back, pure white belly. Built for speed.
- Cookiecutter Shark: Small, dark cigar-shaped body with a glowing belly and a circular cookie-shaped mouth. Weird and memorable.
- Cartoon shark: Round friendly eyes, big silly grin showing all the teeth, slightly chubby body. Great for kids’ books.
Ocean Scenes & Compositions
- Coral reef hunting: Shark gliding past a colorful reef with small fish scattering in panic. Schools of fish in the background add depth.
- Surface fin: Only the dorsal fin and part of the tail visible above the waterline, with the rest of the shark suggested as a shadow underwater. Iconic suspense.
- Diver encounter: A scuba diver in the foreground with a curious shark approaching from the side. Tense but not aggressive.
- Cage diving scene: A metal shark cage with a person inside, the shark circling around. Adventure-movie style.
- Feeding frenzy: Multiple sharks in chaotic motion around a school of fish, with bubbles and motion lines for energy.
- Shark with prey: Shark mid-attack on a seal or large fish silhouette. Dramatic for older audiences only.
- Whale shark with snorkeler: Tiny human swimming alongside the massive but gentle whale shark. Awe-inspiring scale.
- Friendly cartoon shark in school: Cartoon shark with a backpack and pencil heading to school underwater. Pure children’s book joy.
The Counter-Shading Trick
Almost every shark uses counter-shading: a darker top and a lighter bottom. This is the camouflage that makes them invisible from above (back blends into deep water) and from below (belly blends into bright surface). Use it in your drawing:
- Top half: Deep grey-blue, dark slate, or olive green. The dorsal fin and back match.
- Middle band: A slightly lighter shade fading into the belly tone.
- Belly: Pure white or cream. Make sure the contrast is visible.
- Transition line: The line between dark and light should not be sharp – let it blur slightly along the side.
Color Palettes for Different Moods
- Realistic Great White: Slate-grey back, ash-grey middle, white belly, black eye, light pink gum line, ivory teeth.
- Tropical reef: Bright turquoise water, coral pinks and oranges in the background, sharper contrast on the shark.
- Deep sea horror: Almost black water, dark navy shark, glowing yellow-green eye, faint red glow from below.
- Sunset surface: Orange-pink water, dark silhouette shark, golden ripples on the surface.
- Storybook cartoon: Soft baby-blue water, bright cyan shark, rosy belly, big white smile. Friendly and cute.
Adding Movement to Your Shark
A static shark is fine, but small touches add motion and life:
- Bubbles trailing from the gills – even three or four small circles is enough.
- Small fish scattering in front of the shark’s face suggests speed.
- Light rays from above filtering through the water, hitting the back of the shark.
- The tail in mid-swing rather than perfectly horizontal – sharks always look like they’re moving when the tail is curved.
- Sand kicked up if the shark is near the seafloor.
Common Mistakes to Avoid
1. The body is too round. Sharks are streamlined, not chubby. A round body reads as fish, not shark.
2. The dorsal fin is too small. The dorsal fin is dramatic and prominent. A tiny fin makes the shark look harmless.
3. The tail is symmetric. A real shark’s upper tail lobe is longer than the lower one (especially on Great Whites). A symmetric tail belongs to a tuna.
4. The mouth is in the wrong place. Shark mouths are on the underside of the head, not at the tip of the snout. Front-facing mouths read as a dolphin.
5. Forgetting the gill slits. Five vertical slits on each side of the head, just behind the eye. Without them, the shark looks like a wax figure.
6. Teeth in a perfect row. Real shark teeth are uneven in size and slightly tilted. A perfect zig-zag pattern looks fake.
7. No pectoral fins. The two large “wing” fins on the underside near the front are essential. Without them, the shark can’t balance and looks like a sausage.
Frequently Asked Questions About Drawing a Shark
How do I draw the shark’s teeth realistically?
Draw the teeth as small triangles along the curve of the mouth. Vary their sizes slightly for a natural look.
Where should I place the dorsal fin?
Position the dorsal fin slightly behind the midpoint of the body to mirror a real shark’s anatomy.
What colors should I use to make the shark look lifelike?
Use a combination of gray and blue for the body, adding white highlights to mimic the reflective surface of a shark’s skin.
How can I make my shark look more dynamic?
Angle the body diagonally and curve the fins slightly to suggest movement through water.
Why does my shark look flat?
Ensure you are using shading and gradients to add depth, especially along the body and around the fins.
What’s the purpose of the lateral line?
The lateral line helps sharks detect vibrations in the water, an essential feature for hunting and navigation.
Your Shark Drawing Is Complete!
Congratulations on completing your shark drawing! You’ve learned how to use an auxiliary line to structure your drawing and bring this magnificent creature to life.
We hope you enjoyed this tutorial. Feel free to explore other lessons on our website to further expand your drawing skills and tackle new challenges.
More Template Ideas


Take a picture and send it to show@colomio.com – we publish it on www.colomio.com!
All tutorials and images are copyrighted by happycolorz GmbH. Interested in using it? Please send a mail to info@colomio.com.
More ideas for drawing
-

Airplane drawing -

Plane drawing easy -

Apple drawing -

Bicycle drawing -

Ship drawing -

Car drawing -

Car drawing easy -

Cat drawing -

Cow drawing -

Dinosaur drawing -

Dog drawing -

Puppy drawing -

Dragon drawing -

Digger drawing -

Fairy drawing -

Giraffe drawing -

Lion drawing -

Mermaid drawing -

Moon drawing -

Motorcyle drawing -

Penguin drawing -

Pig zeichnen (einfach) -

Princess drawing -

Reindeer drawing -

Rooster drawing -

Santa Claus drawing -
Shark drawing -

Sheep drawing -

Strawberry drawing -

Sunflower drawing -

Tiger drawing -

Tractor drawing -

Train drawing -

Tree drawing -

Tree drawing easy -

Tulip drawing -

Turtle drawing -

Unicorn drawing -

Unicorn drawing easy -

Witch drawing
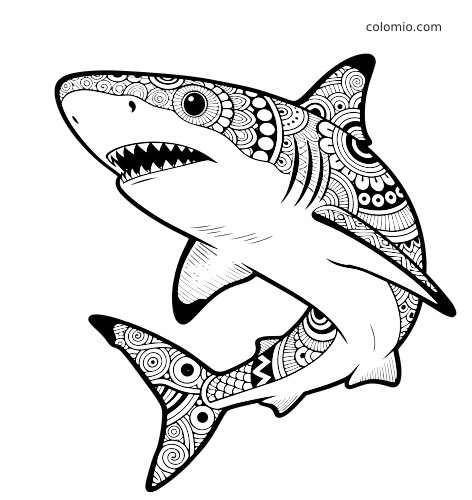
Print our free printable shark coloring pages — ready-to-print line art, no signup.
More Crafting Ideas
-

Bee craft -

How to Make a Paper Boat -

How to make an envelope -

Ladybug Craft -

Origami Boat -

Butterfly Craft


