

|
||||
|---|---|---|---|---|
| Free Download | ||||
|
|
|
Image file | ||
The following instructions will guide even painting beginners step by step to a beautiful lion, which you can easily draw with the appropriate templates.
For this drawing you need a pencil, a black drawing pencil and the typical colors for lions. You can use colored pencils as well as fiber pencils, wax crayons or even acrylic paints. How you design your lion later is entirely up to you. And off you go:

Step 1: Head and Mouth
Draw a large oval and place a smaller one in front of it. Both must touch each other.

Step 2: Hull
Now draw two more, even larger ovals in a staggered manner. The top edges of all three large ovals should be approximately on the same plane (if necessary, draw an auxiliary line with the pencil).

Step 3: Neck, Back, Tail and Limbs
Draw a top line for the lion by connecting the ovals. Extend the line beyond the last oval. This will be the tail. Also draw the lion’s legs, which will have joints indicated in the center with the help of small circles. Don’t forget the feet!

Step 4: Permanent Contours for Head, Back and Belly
Draw the top line with a dark drawing pencil. Also sketch the snout of the animal. Connect the two large ovals on the bottom so that the lion’s belly is visible.

Step 5: Final Contours for the Legs
Draw the lion’s legs at a small distance from the guide lines. Outline the lion’s paws as well. Use a black pencil or fineliner for this.

Step 6: Face, Mane and Tail Tip
Now indicate the lion’s mane and ear. Draw the tail clearly and give it a tip.

Step 7: Removing the Guides
Remove all the guides and ovals that are still visible with an eraser. Only the figure of the lion remains.

Step 8: Coloring
Now use the selected colors to give the lion its natural color.
Your Lion Drawing Is Complete!
Congratulations – you’ve drawn a majestic lion from scratch! With just a few basic shapes, guide lines and a steady hand, you’ve captured the king of the savanna on paper. We hope you enjoyed the process and feel motivated to keep practicing.
Looking for your next challenge? Have a look at our tiger drawing, giraffe drawing or dragon drawing tutorials – all built on the same easy step-by-step method.
Tips for an Even Better Lion Drawing
The mane is what gives the lion its character. Don’t try to draw every single hair – instead, work in flowing groups of curves, alternating shorter strokes near the face and longer ones at the outer edge. This creates depth and movement without overwhelming the picture.
For coloring, mix at least two warm tones (for example a soft yellow and a deeper orange-brown) and add a few darker accents around the mane and tail tip. A small white highlight in each eye instantly makes your lion look alive.
Lion Variations: Beyond the Standard Male
The same body plan can become very different lions with small adjustments:
- African male lion (the classic): Massive golden body, full dark mane around the face and shoulders, light beige belly, black tail tuft. The textbook lion.
- Asiatic lion: Slightly smaller body, shorter and less dense mane that doesn’t cover the ears, a distinctive belly fold along the underside. Found only in India’s Gir Forest.
- White lion: Pure cream-white coat, pale golden eyes, pinkish-beige mane. A genetic variant of the African lion – rare and striking.
- Lioness: Sleeker body without a mane, more athletic posture, sharper face. Often drawn in hunting or protective poses.
- Lion cub: Smaller body with proportionally bigger head and paws, faint spotted markings on the legs and belly (these fade with age), oversized ears, no mane. Pure storybook charm.
- Barbary lion (extinct in the wild): Massive body, very dense dark mane reaching down to the belly. The lion of Roman colosseums.
- Black-maned male: Older African male lions develop very dark, almost black manes – signaling dominance and age.
- Cartoon lion: Round friendly face, oversized fluffy mane like a sun, big smile, big shiny eyes. Pure children’s book magic.
Pose Variations: Bring the King to Life
A standing lion is fine, but lions are masters of expressive postures:
- Roaring: Head tilted upward, mouth wide open with all four canines visible, mane fanned out, body slightly puffed up. The signature dominance pose.
- Lying down (sphinx pose): Body resting on the belly, front paws extended forward, head held high. Calm and majestic – the classic Egyptian sphinx position.
- Sleeping curled up: Lion lying on its side with paws tucked, mane spread on the ground like a cushion. Peaceful giant.
- Stalking lioness: Body held very low, almost touching the ground. Shoulder blades visible above the spine, ears flattened, eyes locked forward.
- Sitting like a regal statue: Front legs straight, body upright, gaze forward. The throne-room lion pose.
- Mid-leap: All four paws off the ground, body extended horizontally, claws extended. Dramatic and rare.
- Pride scene: Multiple lions arranged together – one male standing tall, two lionesses lying down, three cubs playing. Family hierarchy on display.
- Cub on father’s back: Tiny cub climbing or sitting on the male lion’s back, completely unbothered. Heart-melting.
Mastering the Mane
The mane is what makes a male lion unforgettable, and most beginners draw it too simply. A few tricks:
- Draw the mane in flowing groups of curves, never as individual strands. Each group is a wave of fur moving in a roughly downward direction.
- The mane is shorter and thinner around the face, denser and longer at the shoulders and chest.
- Use at least three shades of color: a base tan, a darker brown for shadows, and a lighter golden highlight at the edges. Even a stylized mane benefits from this layering.
- Add a few stray strands sticking out at irregular angles – perfectly groomed manes look fake.
- The mane should never be a perfect oval around the head. Let it be longer in some places, shorter in others, with a clear sense of weight at the bottom.
- For old males, add streaks of black or dark brown deep within the mane.
Savanna Scene Compositions
A lion really comes to life in its natural environment:
- Sunset on the savanna: Lion silhouette against an orange-gold sky, tall acacia tree on one side, distant herd of zebras as small dark shapes. Iconic Africa.
- On a rocky outcrop (Pride Rock): Lion standing high on a rocky promontory, surveying the kingdom below. Lion-King-style.
- Drinking at a waterhole: Lion lapping water with its reflection visible, tall reeds and grasses around the edge.
- Resting under an acacia tree: Lion lying in the shade of a wide flat-topped acacia, dappled light on its mane.
- Hunting in tall grass: Lioness barely visible, only ears and eyes peeking above the golden grass. Tense and atmospheric.
- Pride at rest: Multiple lions lounging together in the shade, cubs playing, lazy afternoon vibe.
- Lion vs. zebra (action): Mid-chase scene with a zebra fleeing in the foreground and the lion stretched out in pursuit. Drama.
- Storybook lion at the zoo: Cartoon lion behind a fence with a child looking in, both smiling. Friendly variation.
Color Palettes for Lions
- Classic African male: Sandy golden-tan body, deep amber-brown mane with darker chocolate streaks, cream belly, pink nose, amber eyes, black tail tuft.
- Sunset lion: Orange-tinted body, deep red-brown mane, pink-purple sky behind, long dark shadow on the ground.
- Black-maned older male: Light tan body, almost-black mane with faint brown highlights, golden eyes, dark grey nose. Authoritative.
- White lion: Cream-white body, pale gold mane with pink undertones, light blue-grey eyes, soft pink nose.
- Realistic dusty lion: Faded tan body with grey shadow areas, weathered brown mane, dust kicked up around the paws. Authentic and rugged.
- Storybook bright: Bright cartoon yellow body, fluffy orange mane like a sunburst, big innocent eyes, pink heart-shaped nose.
- Halloween / fantasy lion: Deep gold body with glowing yellow-green eyes, dark crimson mane, magical sparkles around the head. Mythical.
Common Mistakes to Avoid
1. The mane is a perfect oval. Real manes are uneven and asymmetric. A flat oval ring around the face looks like a costume.
2. Forgetting the tail tuft. A lion’s tail ends in a distinctive black tuft of fur – never just a thin tail. This is one of the most overlooked details.
3. The body is too thin. Lions have powerful, muscular bodies. A slender body looks like a domestic cat scaled up.
4. Round black pupils. Like all big cats, lions have elongated oval pupils, not round. Round dot pupils make them look like cartoon dogs.
5. The lioness has a mane. Female lions have no mane – just a smooth head. If you’re drawing a lioness, skip the mane entirely.
6. The mouth is too small for a roar. When roaring, the jaw drops dramatically – almost vertical. A small open mouth doesn’t convey the sound.
7. Symmetric paws all on the ground. Standing lions usually have one paw slightly forward or raised, not all four planted square. Adds natural movement.
Frequently Asked Questions About Drawing a Lion
What kind of paper works best for this lion drawing?
Standard A4 drawing paper with a smooth or lightly textured surface is ideal. It holds graphite cleanly and lets colored pencils blend without bleeding through.
How can I make the mane look fuller and more realistic?
Draw the mane in soft, curved bundles rather than single strands. Layer two or three colors (for example sand-yellow, ochre and a touch of brown) in the same direction the “hair” would naturally fall.
What if the proportions look off after Step 3?
That’s exactly what the guide lines are for – erase the part you’re unhappy with and redraw it. As long as your basic shapes are right, the final lion will still come together.
Which colors should I use for a classic lion?
A warm yellow base, a darker orange or brown for the mane, a soft pink for the nose and ears, and black for the eyes, claws and tail tip. Add a green or sandy background to make the lion stand out.
Can children follow this tutorial too?
Yes – the step-by-step structure is designed so that kids from around 7 years can follow along with a bit of help. Younger children can simply trace the printable PDF instead.
How long does the whole drawing take?
Plan for around 20–30 minutes for the sketch and another 10–15 minutes for coloring. Take your time – the result is much nicer when you don’t rush the mane and the face.
Take a picture and send it to show@colomio.com – we publish it on www.colomio.com!
All tutorials and images are copyrighted by happycolorz GmbH. Interested in using it? Please send a mail to info@colomio.com.
More ideas for drawing
-

Airplane drawing -

Plane drawing easy -

Apple drawing -

Bicycle drawing -

Ship drawing -

Car drawing -

Car drawing easy -

Cat drawing -

Cow drawing -

Dinosaur drawing -

Dog drawing -

Puppy drawing -

Dragon drawing -

Digger drawing -

Fairy drawing -

Giraffe drawing -
Lion drawing -

Mermaid drawing -

Moon drawing -

Motorcyle drawing -

Penguin drawing -

Pig zeichnen (einfach) -

Princess drawing -

Reindeer drawing -

Rooster drawing -

Santa Claus drawing -

Shark drawing -

Sheep drawing -

Strawberry drawing -

Sunflower drawing -

Tiger drawing -

Tractor drawing -

Train drawing -

Tree drawing -

Tree drawing easy -

Tulip drawing -

Turtle drawing -

Unicorn drawing -

Unicorn drawing easy -

Witch drawing
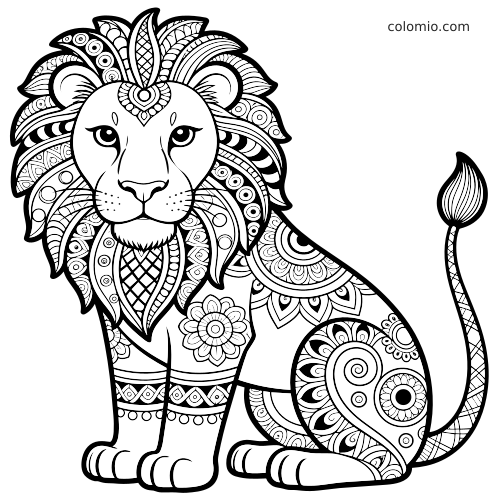
Print our free printable lion coloring pages — ready-to-print line art, no signup.
More Crafting Ideas
-

Bee craft -

How to Make a Paper Boat -

How to make an envelope -

Ladybug Craft -

Origami Boat -

Butterfly Craft


