
Drawing an apple is one of the easiest and most rewarding drawing exercises for beginners of all ages. Whether you are a parent looking for a fun art activity, a teacher planning a creative lesson, or a young artist just getting started – this step-by-step apple drawing tutorial will walk you through the entire process using clear pictures and simple instructions.
The technique used in this tutorial is based on two overlapping ovals, which makes it surprisingly easy to achieve the classic apple shape on your first attempt. No prior drawing experience is needed.
What You Will Need
- A sheet of white paper (A4 or letter size)
- A hard pencil (e.g. HB) for sketching light guide lines
- A soft pencil (e.g. 2B) or an eraser-proof ink pen for final outlines
- An eraser
- Colored pencils in red, green, and brown
Use the hard pencil to draw the guide outlines. Then trace over them with the soft pencil or ink pen. An eraser-proof pen is ideal because you can remove the guide lines later without damaging the permanent contours. The contours will also not smear.

Step 1: Draw the Left Half of the Apple
Begin by drawing an upright oval in the center of your paper. Tilt it slightly to the left – about 10 to 15 degrees. This oval will form the left side of your apple’s body.
Tip: Use light, gentle strokes with your hard pencil (HB). These are guide lines that you will erase later, so don’t press too hard. The lighter the lines, the easier they are to remove. The oval should be roughly the size you want your finished apple to be.

Step 2: Draw the Right Half of the Apple
Now draw a second oval of the same size, but tilt it slightly to the right. Position it so that it overlaps with the first oval. The two ovals together create a heart-shaped body – this is the basic silhouette of your apple.
Tip: Make sure both ovals are approximately the same size and height. If they are uneven, the apple may look lopsided. You can use a ruler to lightly mark the center of your paper as a reference point to keep things symmetrical.

Step 3: Connect the Outlines and Use a Drawing Pen
Now it is time to connect the outer contours of both ovals to form the final apple shape. Trace along the outside edges only, creating one smooth, continuous outline. Use your soft pencil (2B) or an eraser-proof ink pen for this step.
The bottom of the apple should be round and full, while the top has a slight indentation where the two ovals meet – just like a real apple. Take your time to make the line smooth and confident.
Why use an ink pen? An eraser-proof pen ensures that your final outlines stay intact when you erase the guide lines in the next step. This gives your drawing a clean, professional look that stands out.

Step 4: Add the Stem and Erase the Guide Lines
Use your eraser to carefully remove all the inner guide lines – especially the overlapping area in the center where the two ovals crossed. What remains should be the clean outline of an apple.
Next, draw a small stem at the top of the apple. The stem should be a short, slightly curved rectangle pointing upward from the indentation at the top. A natural-looking stem is about 1 to 1.5 cm long and slightly thicker at the base where it connects to the fruit.

Step 5: Draw a Leaf on the Stem
Add a leaf to one side of the stem. Draw a simple elongated oval shape that tapers to a point at both ends – similar to a stretched diamond. You can add a center line (the leaf vein) and a few small diagonal lines branching off it for extra detail and realism.
Tip: The leaf should be proportional to the apple – not too large and not too small. It typically curves slightly downward or to the side, giving the drawing a natural, organic feel. A well-drawn leaf can make the entire apple look much more lifelike.

Step 6: Color Your Apple Drawing
Now comes the most fun part – adding color! Use a red colored pencil to fill in the apple’s body. For a more realistic look, vary the pressure: press harder at the edges and lighter toward the center to create a subtle gradient effect.
Important detail: At the top left, leave two small circular areas blank according to the template. These white spots simulate the reflection of light on the apple’s round surface, making it look three-dimensional and shiny. This simple trick is used by professional illustrators to add depth to round objects.
Fill the stem with brown and the leaf with green. You can add a touch of yellow-green to the leaf’s center for extra realism.
Optional Enhancements to Try
- Add a shadow beneath the apple using light gray to give it a grounded look on the surface
- Try blending two shades of red (light and dark) for more depth and dimension
- Add a subtle yellow or green gradient on one side of the apple for a more natural color variation
- Draw a second apple next to the first, or place your apple in a basket or on a table for a complete scene
Easy Apple Drawing — A Simpler Version for Beginners
If the full 6-step tutorial feels detailed, this easy apple drawing takes only three quick moves. Draw a slightly tilted circle, push the top in a little for the classic apple dip, then add a short stem and a single leaf. That is it — a clean apple silhouette that any beginner can finish in under five minutes. This is also the version we recommend if you are guiding a young child through their first simple apple drawing.
Apple Drawing for Kids — Big Shapes, Big Wins
For children aged 4–8 the trick is to keep everything chunky. An apple drawing for kids works best with thick outlines, oversized leaves, and a friendly face if you want to turn it into a cartoon. Draw a big round body, an even bigger green leaf, a thick brown stem, and (optionally) two dot eyes and a smile. Kids love coloring these because every section is large enough for crayons without going outside the lines. Print our PDF for a ready-made kids version.
Realistic Apple Drawing — Add Shading and Highlights
To turn your sketch into a realistic apple drawing, focus on three things: a curved highlight on the upper-left of the apple body, soft shadows on the lower-right, and a small shadow on the surface beneath the fruit. Use a soft graphite pencil for the shading and blend with a paper stump or your finger. Add a tiny notch where the stem meets the body — that small dip is what separates a cartoon apple from a photo-real one. Realistic apple drawings work especially well with colored pencils because you can layer reds, deep maroons, and a touch of yellow for the highlight.
Apple Coloring Page — Free Printable PDF
Want to skip the drawing and jump straight to coloring? Our apple coloring page is available as a free printable PDF — clean outlines, generous coloring spaces, optimized for DIN A4 / US Letter. It includes a single classic red apple, a Granny Smith variation, and a small composition with three apples in a bowl. Perfect for classroom activities, rainy afternoons, or as a calm-down exercise. Download the PDF at the top of this page.
Apple Variations: Beyond the Standard Red Apple
The same drawing template adapts beautifully to almost every real apple variety:
- Red Delicious: Classic deep red apple with five distinct bumps at the bottom (the “crown”), tall vertical shape. The textbook American apple.
- Granny Smith: Bright Crayola-green apple, slightly more spherical, often shown with a tiny pink blush on one side. Perfect for graphic design.
- Golden Delicious: Soft golden-yellow body with sometimes a pinkish blush, slightly elongated. Warmer and softer than red apples.
- Gala / Fuji: Streaky red-and-yellow apple with vertical patterns of color, more rounded shape. The most common modern supermarket apple.
- Pink Lady: Round apple with a clear gradient from pinkish-red on top to creamy yellow at the bottom. Very photogenic.
- Honeycrisp: Mostly red with patches of green-yellow showing through, like a watercolor wash. Distinctive marbled look.
- Crab apple: Tiny apples (smaller than a golf ball), drawn in clusters of 3–5 on a single stem. Ornamental and storybook-cute.
- Bitten apple: A curved chunk missing from the side, exposing the lighter flesh inside. Shows slight tooth marks at the edge. Adds character (and humor).
- Cross-section: Apple cut horizontally to reveal the star-shaped seed pattern in the middle. Educational and beautiful.
- Cartoon apple: Round face on the body of the apple, eyes, smile, blushed cheeks. Pure children’s book joy.
Apple Compositions & Scenes
A single apple is sweet, but compositions tell a story:
- Apple with worm: A tiny green worm peeking out of a small hole in the apple, often with a small smile. The classic children’s book apple.
- Apple in a basket: A wicker basket overflowing with 6–8 apples in different colors, some tilted at different angles. Add a single leaf for life.
- Apple tree: A round green canopy with red apples scattered throughout, brown trunk, a few fallen apples on the ground. Classic orchard scene.
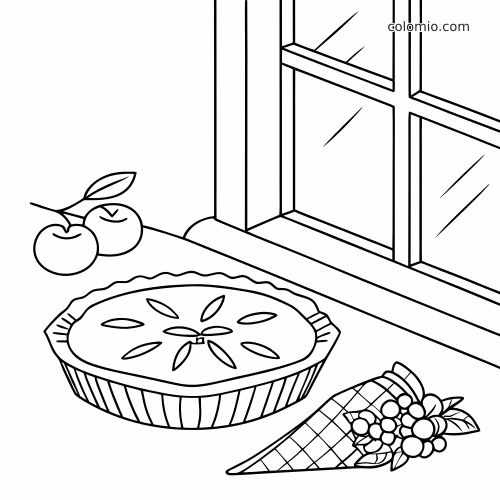
- Apple pie: Slice of apple pie with golden lattice crust, visible apple chunks inside, vapor rising from the top. Cozy autumn vibe.
- Caramel apple on a stick: Apple coated in glossy caramel with sprinkles or nuts pressed in, wooden stick handle. Halloween / autumn fair classic.
- Apple still life: Three apples grouped on a wooden table with one cut in half showing the seeds. Elegant and painterly.
- Adam & Eve symbolism: A red apple held in a hand, with a serpent wrapped around the wrist. More artistic and symbolic.
- Apple with teacher: Single shiny apple on a stack of books, with a wooden ruler or pencil nearby. Back-to-school classic.
- Newton’s apple: Apple falling from a tree, with curved motion lines suggesting gravity. A great science-themed drawing.
- Apple harvest: Wooden ladder leaning against a tree, basket at the base, two or three apples mid-fall.
The Magic Is in the Highlights
What separates a flat round shape from a juicy 3D apple is the play of light on its skin:
- The main highlight: A bright white reflection on the upper-left (or wherever your light source is). This single white spot does more than any shading to make the apple look real.
- Secondary highlight: A smaller, dimmer reflection on the opposite side – a hint of light bouncing back.
- The shadow side: A deeper, darker tone of red or green on the side away from the light.
- Cast shadow: A dark shadow on the surface beneath the apple, slightly elongated, pointing away from the light source.
- Edge darkening: The very rim of the apple should be slightly darker than the middle, helping the eye perceive curvature.
- Color variations within the apple: Real apple skins are never one solid color – mix two or three shades of red (or green) to suggest texture and ripeness.
The Stem & Leaf Details
The stem and leaf are tiny but crucial:
- The stem: Short, thick, slightly curved – never a long straight line. Real apple stems are stubby. Color is dark brown.
- The crown indent: The small dimple where the stem emerges from the apple. Add a soft shadow inside this dimple.
- The blossom end: The bottom of the apple has a small five-pointed star pattern (where the flower used to be). A subtle but realistic detail.
- The leaf: One or two small green leaves attached to the stem, with a clear central vein and a slightly serrated edge. Tilt the leaf slightly so it doesn’t look pasted on.
- Withered leaf: For autumn apples, the leaf can be partly yellow or brown at the edges – suggests harvest time.
Color Palettes for Apples
- Classic glossy red: Bright cherry-red body, deeper crimson shadows, pure white highlight, dark brown stem, vibrant green leaf.
- Granny Smith green: Crayola-bright green body, lime highlights, slightly darker emerald shadows, dark brown stem, deep green leaf.
- Gala streaks: Mostly red base with vertical streaks of yellow showing through, brown stem, slightly red-tinted leaf. Realistic supermarket look.
- Pink Lady gradient: Soft rose-pink top fading into pale cream-yellow bottom, brown stem, sage-green leaf.
- Storybook bright: Pure flat red with a single oversized white highlight, no gradient, cartoon-friendly. Perfect for kids’ books.
- Vintage botanical: Muted brick-red body, brown-tinted shadows, sage-green leaf, parchment-cream background. Old-fashioned encyclopedia look.
- Autumn harvest: Deep red-orange body, golden-yellow blush, warm brown stem, partly yellowing leaf. Late-season warmth.
- Watercolor wash: Soft layered reds with visible brushstrokes, gentle bleeding edges, off-white background. Painterly and soft.
Adding Realism & Personality
Tiny details that elevate any apple drawing:
- Tiny dots on the skin (lenticels): Small light freckles scattered across the apple surface. A subtle but very realistic detail.
- Drop of water: A small clear droplet on the surface with a tiny white highlight inside – suggests the apple was just washed.
- Bite mark with detail: Show small tooth indentations and a slightly browning interior (since apples oxidize quickly).
- Apple with bow or ribbon: Adds a gift or holiday feeling. Christmas red ribbons especially.
- Tiny shadow under the leaf: Where the leaf overlaps the apple body, a small dark shadow gives it 3D presence.
- Reflection on a polished surface: If the apple sits on a glossy table, add a faint mirror image below.
- Tilt the apple slightly: A perfectly upright apple looks artificial. A small tilt to one side feels natural.
Common Mistakes to Avoid
1. The apple is a perfect circle. Real apples are slightly heart-shaped – wider at the top, tapering downward, with a small dimple at both top and bottom. A perfect circle reads as a tomato or cherry.
2. Forgetting the highlight. Without a bright reflection on the upper surface, the apple looks dry and matte. The highlight is what makes the apple look juicy.
3. The stem is too long or too thin. Real apple stems are short, thick, and stubby – almost like a small woody nub. Long thin stems read as cherry stems.
4. The leaf is too big. A leaf the size of the apple looks fake. Keep it modest – about a third the size of the apple at most.
5. Single flat color. Even cartoon apples benefit from at least two shades – a base red and a slightly darker red on the shadow side.
6. Symmetric perfection. Real apples are slightly lopsided – one side a bit wider than the other. Force-fitting symmetry kills the natural look.
7. The shadow is missing. Without a cast shadow underneath, the apple appears to float. Even a small gray blob below grounds the drawing.
Frequently Asked Questions About Drawing an Apple
What age is this apple drawing tutorial suitable for?
This tutorial is designed for children aged 8 and up, as well as adult beginners. The two-oval technique is simple enough for young children to follow with a little guidance from a parent or teacher.
Can I use markers or crayons instead of colored pencils?
Yes, absolutely! Markers, crayons, or even watercolors all work well for coloring your apple. Just make sure your final outlines are drawn with a waterproof pen if you plan to use watercolors, so they do not smudge or bleed.
How do I make my apple drawing look more realistic?
Focus on shading and highlights. Use darker red tones on the sides and bottom of the apple, and leave the highlight spots white. Adding a subtle shadow underneath the apple also greatly improves the sense of realism and depth.
What if my ovals do not look perfect?
That is completely fine – slight imperfections actually make the apple look more natural and authentic. Real apples are not perfectly symmetrical either. If you would like more control, practice drawing ovals a few times on scratch paper before starting your final drawing.
Can I draw a green apple instead of a red one?
Of course! Simply use green colored pencils instead of red. Green apple varieties like Granny Smith often have a slightly more elongated shape, so you can adjust your ovals to be a bit taller and narrower for a different look.
What is the best paper for this drawing exercise?
Standard white drawing paper or sketch paper works perfectly. If you plan to use watercolors or markers, choose a slightly thicker paper (at least 120 g/m²) to prevent bleeding or warping.
Your Apple Drawing Is Complete!
Congratulations – you have successfully drawn a beautiful apple! This simple exercise teaches fundamental drawing skills like working with basic geometric shapes, creating clean outlines, and adding shading and highlights for a three-dimensional effect.
The two-oval technique you learned here can be applied to many other round fruits and objects. Once you have mastered the apple, try our other nature drawing tutorials to expand your skills and build confidence.
More Template Ideas


Take a picture and send it to [email protected] – we publish it on www.colomio.com!
All tutorials and images are copyrighted by happycolorz GmbH. Interested in using it? Please send a mail to [email protected].
Print our free printable apple coloring pages — ready-to-print line art, no signup.
More ideas for drawing
-

Airplane drawing -

Plane drawing easy -

Apple drawing -

Bicycle drawing -

Ship drawing -

Car drawing -

Car drawing easy -

Cat drawing -

Cow drawing -

Dinosaur drawing -

Dog drawing -

Puppy drawing -

Dragon drawing -

Digger drawing -

Fairy drawing -

Giraffe drawing -

Lion drawing -

Mermaid drawing -

Moon drawing -

Motorcycle drawing -

Penguin drawing -

Pig zeichnen (einfach) -

Princess drawing -

Reindeer drawing -

Rooster drawing -

Santa Claus drawing -

Shark drawing -

Sheep drawing -

Strawberry drawing -

Sunflower drawing -

Tiger drawing -

Tractor drawing -

Train drawing -

Tree drawing -

Tree drawing easy -

Tulip drawing -

Turtle drawing -

Unicorn drawing -

Unicorn drawing easy -

Witch drawing


