Level of difficulty:
EasyAdvanced
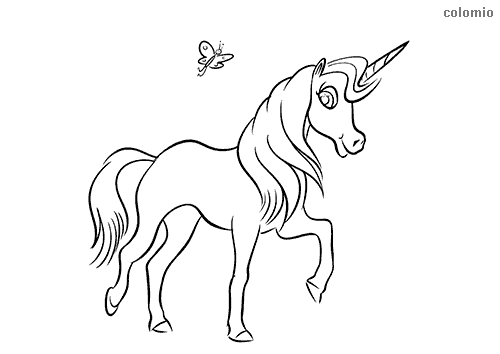
A unicorn is not only the dream of little girls. The graceful mythical creatures enchant young and old and stand for magic and the courage to be different. With the right tricks it is not difficult to draw a wonderful unicorn. This tutorial shows you step by step how to do it. You can also use it as a template for drawing a horse.
For the drawing you need a pencil, an eraser, an eraser-proof drawing pen and suitable colors according to your preferences. You can use a dividers for the circles, but circles drawn freehand are usually sufficient for animal drawings. Otherwise they quickly look too artificial.

Step 1: Head and muzzle
First draw two circles with the pencil to define the future head of the animal. If you want your unicorn to remain white at the end, the pencil lines must be very thin so that they disappear completely after erasing.

Step 2: Hull
Using two larger circles, mark the prominent points of the torso where the strong muscles are located.

Step 3: Neck, back and tail
Now sketch the nose, neck, back and tail of the animal with a continuous curved line. Make sure that the line is natural and not too straight.

Step 4: Horn and chest
Complete the sketch of the torso and head, already marking the position for the horn.

Step 5: Limbs and first permanent contours
Now sketch the legs at a gallop. Make sure that the posture is natural. Use small circles to represent the joints where the legs are bent and already indicate the hooves. Then use a pencil to draw the head, body and tail line. Add the first details to the head.

Step 6: Mane and other details
Complete the legs and face with the drawing pencil. Add a flowing mane and draw a flowing tail.

Step 7: Removing the guides
Carefully erase the underlying pencil drawing and all guides.

Step 8: Coloring
In the last step you can color your unicorn. By shading or using light and dark colors, you can create a three-dimensional effect and make the unicorn look even more realistic.
More Template Ideas
Take a picture and send it to show@colomio.com – we publish it on www.colomio.com!
All tutorials and images are copyrighted by happycolorz GmbH. Interested in using it? Please send a mail to info@colomio.com.
Simple unicorn painting
With the help of this template, you’ll be able to draw a lively unicorn in cartoon style step by step. You’ll need a hard pencil for drawing fine outlines, an eraser, an eraser-proof drawing pencil in a dark color, and a pack of colored pencils. Let’s go!

Step 1: Head and muzzle
Take the pencil and start at the top right with the head. For this, you place two circles next to each other. The larger one is to the left of the smaller circle, which is actually more oval and from which you will later make the nose.

Step 2: Hull
With a little distance you place a larger circle under the head for the chest. To the left of it you place a smaller circle for the back. The instructions show you the distances and positions of the individual shapes.

Step 3: Legs and tail
With a little sweep, draw a line on the hindquarters to indicate the course of the tail. The template illustrates how to draw the position of the legs with strokes.

Step 4: First permanent contours
Use the drawing pencil to trace the contours of the body. Outline the head with the nostrils and connect the head to the torso. The horse now has a belly, back and neck.

Step 5: Final silhouette and face
With the drawing pencil you give the unicorn its ears. It now also gets eyes, nose and mouth. When designing the tail, use the guide line as a guide. You paint the legs wider and let them end in small hooves.

Step 6: Horn, mane and tail
The unicorn takes more and more shape. You draw the mane with sweeping lines and give the tail more structure. With the horn you make the little horse a real unicorn. Let the template inspire you!

Step 7: Removing the guides
Now erase the guide lines. The unicorn is almost finished.

Step 8: Coloring
You grab the colored pencils and color your unicorn colorful. On the template, the unicorn is a white horse with a colorful mane. For the tutorial we used the colors pink, blue, green and yellow. But you can be creative and paint your unicorn the way you like it best.
Take a picture and send it to show@colomio.com – we publish it on www.colomio.com!
All tutorials and images are copyrighted by happycolorz GmbH. Interested in using it? Please send a mail to info@colomio.com.
More ideas for drawing
-

Airplane drawing -

Plane drawing easy -

Apple drawing -

Bicycle drawing -

Ship drawing -

Car drawing -

Car drawing easy -

Cat drawing -

Cow drawing -

Dinosaur drawing -

Dog drawing -

Puppy drawing -

Dragon drawing -

Digger drawing -

Fairy drawing -

Giraffe drawing -

Lion drawing -

Mermaid drawing -

Moon drawing -

Motorcyle drawing -

Penguin drawing -

Pig zeichnen (einfach) -

Princess drawing -

Reindeer drawing -

Rooster drawing -

Santa Claus drawing -

Shark drawing -

Sheep drawing -

Strawberry drawing -

Sunflower drawing -

Tiger drawing -

Tractor drawing -

Train drawing -

Tree drawing -

Tree drawing easy -

Tulip drawing -

Turtle drawing -

Unicorn drawing -

Unicorn drawing easy -

Witch drawing


