

|
||||
|---|---|---|---|---|
| Free Download | ||||
|
|
|
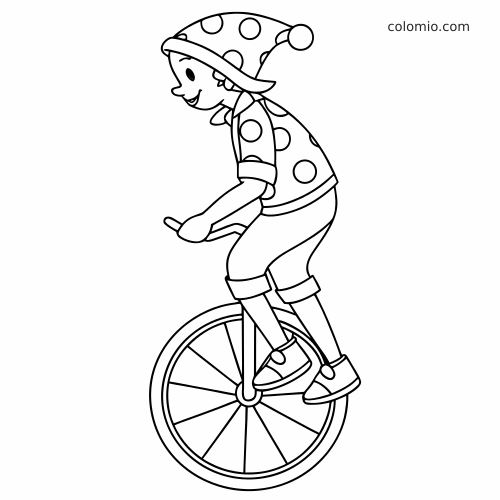
Image file | ||
With this template you draw step by step a bike with all its details. What looks complicated, succeeds with this template quite simple. You just need a little patience.
Have a pencil, eraser, ruler, dividers, black eraser-proof pencil and colored pencils ready.
Welcome to our step-by-step tutorial on drawing a bicycle! This guide is designed for children and beginners, making it perfect for ages 8 and up. You’ll learn how to create a detailed bicycle drawing using basic shapes and lines, helping you to understand the structure of a bicycle better.
Through this tutorial, you’ll develop your drawing skills using simple techniques and tools. We focus on using guide lines and basic shapes to construct the bicycle, making it easy and fun. By the end, you’ll have a colorful and realistic bicycle drawing to be proud of!
What You Will Need
- HB pencil for initial sketching
- Drawing pencil (2B or 4B) for defining contours
- Eraser for removing guide lines
- Colored pencils – blue for the frame, gray-brown for the tires, or colors of your choice
- Compass for drawing circles
- Ruler for straight lines
- Drawing paper (A4 or A3 recommended)

Step 1: Guides
First, use a pencil and ruler to draw three transverse guide lines on your paper. These lines should be evenly spaced and parallel to each other, forming the base structure for your drawing. Tip: Lightly sketch these lines so they can be easily erased later.
These guide lines will help you position the key components of the bicycle accurately.

Step 2: Wheels and chainring
Next, use a compass to draw two identical circles on the guide lines, one on the left and one on the right, representing the wheels. Position the needle on the middle guide line and draw a complete circle around it. Inside the left circle, add a smaller circle for the chainring, and repeat for the right circle to create the hubs.
Make sure the circles are perfectly round to ensure a realistic wheel shape.

Step 3: Basic position luggage rack, seat post, bike fork
Now, draw a diagonal line from the center of each circle towards the upper left. These lines will serve as the basic positions for the luggage rack, seat post, and bike fork. Tip: Use a ruler to maintain straight and even lines for precision.
This step helps in establishing the bike’s framework, guiding the placement of other components.

Step 4: Basic shape bike frame
Using your pencil, sketch the basic positions of the handlebars, saddle, luggage rack, pedal arm, and chain. With these elements in place, your bicycle now takes the form of a rough line drawing.
Tip: Keep your lines light and make adjustments as needed to ensure a balanced composition.

Step 5: Permanent contours
Switch to a drawing pencil to outline the frame, saddle, handlebars, chain, and luggage rack. These elements are crucial for the final shape of your bicycle. Add the pedals, steering wheel grips, and a light for extra detail.
Pay attention to the thickness and curves of these elements to create realistic contours.

Step 6: Tires and other details
Now, focus on the tires and fenders by using your drawing pen to add these details. The tires should follow the outline of the circles you drew earlier, while the fenders should hug the tires closely.
Tip: Use smooth, steady strokes to ensure clean and defined outlines.

Step 7: Spokes & removal of guides
Paint the spokes into the wheels, evenly spacing them for a realistic look. Add any additional details you see fit, like valve stems or reflectors. Finally, use an eraser to remove the guide lines, cleaning up your drawing.
With the guide lines gone, your bicycle drawing will appear neat and complete.

Step 8: Coloring
Bring your bicycle to life by coloring it! Use a blue pencil for the frame and gray-brown for the tires, or choose colors that inspire you. Tip: Blend colors smoothly to create depth and interest.
Feel free to add personal touches, like a colorful basket or unique decals.
More Template Ideas


Your Bicycle Drawing Is Complete!
Congratulations on completing your bicycle drawing! You’ve learned how to use basic shapes and guide lines to construct a detailed illustration. We hope you enjoyed the process and discovered new techniques along the way.
If you’re eager to continue drawing, check out our other tutorials on vehicles or landscapes. Keep practicing, and soon you’ll be creating even more complex drawings with ease!
Tips for an Even Better Bicycle Drawing
The thing that makes a bicycle drawing look right or wrong, before any detail is added, is the geometry of the two circles. Both wheels must be the same diameter, sitting on the same horizontal ground line, with the right amount of space between them.
A common beginner mistake is to draw one wheel slightly bigger than the other or to place one slightly higher. Even a 5% difference makes the bike look broken. Always draw both circles first, side by side, before anything else.
The frame is built around an imaginary triangle: the seat tube goes from the rear axle up to the saddle, the down tube goes from the saddle area down to the front wheel hub, and the top tube connects the saddle area to the handlebar stem. Sketch this triangle lightly first, then draw the actual frame tubes around it.
The handlebars and the saddle should be roughly the same height – a saddle much higher than the handlebars looks like a racing bike, while equal height suggests a city or comfort bike.
For the wheels, don’t exhaust yourself drawing every spoke. Six to eight evenly spaced spokes per wheel are enough to read as “bicycle wheel.” Make sure the spokes meet at a clear hub in the center.
Bicycle Types: Choose Your Style
The same drawing template can become very different bikes with small modifications:
- City / Cruiser bike: Curved, swept-back handlebars, comfortable saddle, wide tires, basket on the front, often a small bell. Friendly and relaxed.
- Mountain bike: Straight flat handlebars, knobby thick tires, sturdy frame, suspension fork visible at the front. Add a few mud splatters for character.
- Road / racing bike: Curved drop handlebars, very thin tires, aggressive forward-leaning frame angle, narrow saddle. Slim and fast.
- BMX: Small 20-inch wheels, raised handlebars with a crossbar, sturdy stunt frame, foot pegs on the axles. Great for action poses.
- Kid’s bike with training wheels: Small frame, wide colorful tires, tassels on the handlebar grips, two small training wheels on the back. Perfect for nursery-style drawings.
- Folding bike: Compact, smaller wheels, visible hinge in the middle of the frame. Practical city style.
- Penny-farthing (vintage): Massive front wheel, tiny back wheel, high seat. The classic 1880s look.
- E-bike: Standard frame plus a clearly visible battery pack on the down tube and a small motor near the rear axle.
Action Poses & Scenes
A parked bike is fine, but a bike in action tells a story:
- Kid riding with the wind: Slight forward lean, hair flowing back, both feet on pedals, big smile. Add motion lines behind the back wheel.
- Wheelie: Front wheel lifted off the ground, rider leaning back. Dynamic and playful.
- Mountain bike jump: Bike fully airborne over a small hill, both wheels in the air. Add dust clouds underneath.
- Bike leaning against a tree: Quiet, peaceful scene. Bike at a slight angle, propped against the trunk. Maybe a basket of apples in front.
- Bike with rider going uphill: Both rider and frame leaning forward heavily, exaggerated effort.
- Tandem bike: Two seats and two sets of pedals connected by a longer frame. Two riders working together.
Background Suggestions
- City street: Buildings in soft pastel colors, lampposts, maybe a parked car. The bike feels urban.
- Park path: A curving path through green grass, with a few trees, benches, and ducks on a small pond.
- Mountain trail: Rocky terrain, distant mountains, dramatic clouds. For mountain bike scenes.
- Beach boardwalk: Sandy ground, palm trees, blue ocean horizon. Relaxed cruiser-bike vibe.
- School scene: Bike parked at a bike rack outside a school building. Backpack hanging on the handlebars.
Color Palettes That Pop
- Classic red bike: Bright red frame, black tires, silver chrome accents, brown leather saddle.
- Pastel kid’s bike: Mint-green frame, pink tassels, white tires, colorful basket. Storybook cute.
- Mountain rugged: Black frame with neon-yellow or orange accents, grey-knobby tires, splash of mud.
- Vintage cruiser: Cream-yellow frame, brown leather saddle and grips, white-walled tires, copper-tone bell.
- Stealth racing: All-black matte frame, deep red accents on saddle and grips, glossy black tires.
Common Mistakes to Avoid
1. Wheels of different sizes. The single most common mistake. Both wheels (except on a penny-farthing) must be the same diameter.
2. Pedals not in the middle. The pedal crank must sit roughly between the two wheels, not under the saddle. The chain runs from this center point back to the rear hub.
3. Forgetting the chain. Even a simple line from the pedal crank to the rear axle reads as “chain.” A bike without one looks unfinished.
4. Spokes drawn off-center. All spokes must clearly meet at the center hub. Spokes ending randomly inside the wheel look chaotic.
5. The handlebars float. The handlebars must connect clearly to the front fork via a vertical stem. Handlebars hovering above the wheel looks broken.
6. Saddle too far back or forward. The saddle should sit roughly above the rear wheel hub, not floating between the wheels.
Frequently Asked Questions About Drawing a Bicycle
What if my circles aren’t perfect?
Don’t worry! Use a compass to help with accuracy, and remember that practice makes perfect. Slight imperfections can add character.
Can I draw the bicycle without a ruler?
While a ruler helps with straight lines and symmetry, you can freehand the lines if you prefer a more organic style.
How can I make my bicycle drawing more realistic?
Pay attention to details like the spokes, chain, and gear details. Adding shadows and highlights can also enhance realism.
What colors should I use?
Traditional bicycles often have blue frames and gray tires, but feel free to choose any colors you like. Personalizing your drawing makes it unique!
How do I fix mistakes?
Use an eraser for small errors and redraw the area. If the mistake is large, consider tracing the drawing onto a new sheet and starting fresh.
Take a picture and send it to show@colomio.com – we publish it on www.colomio.com!
All tutorials and images are copyrighted by happycolorz GmbH. Interested in using it? Please send a mail to info@colomio.com.
More ideas for drawing
-

Airplane drawing -

Plane drawing easy -

Apple drawing -
Bicycle drawing -

Ship drawing -

Car drawing -

Car drawing easy -

Cat drawing -

Cow drawing -

Dinosaur drawing -

Dog drawing -

Puppy drawing -

Dragon drawing -

Digger drawing -

Fairy drawing -

Giraffe drawing -

Lion drawing -

Mermaid drawing -

Moon drawing -

Motorcyle drawing -

Penguin drawing -

Pig zeichnen (einfach) -

Princess drawing -

Reindeer drawing -

Rooster drawing -

Santa Claus drawing -

Shark drawing -

Sheep drawing -

Strawberry drawing -

Sunflower drawing -

Tiger drawing -

Tractor drawing -

Train drawing -

Tree drawing -

Tree drawing easy -

Tulip drawing -

Turtle drawing -

Unicorn drawing -

Unicorn drawing easy -

Witch drawing
Print our free printable bike coloring pages — ready-to-print line art, no signup.
More Crafting Ideas
-

Bee craft -

How to Make a Paper Boat -

How to make an envelope -

Ladybug Craft -

Origami Boat -

Butterfly Craft


