EasyAdvanced


|
||||
|---|---|---|---|---|
| Free Download | ||||
|
|
|
Image file | ||
A unicorn is not only the dream of little girls. The graceful mythical creatures enchant young and old and stand for magic and the courage to be different. With the right tricks it is not difficult to draw a wonderful unicorn. This tutorial shows you step by step how to do it. You can also use it as a template for drawing a horse.
For the drawing you need a pencil, an eraser, an eraser-proof drawing pen and suitable colors according to your preferences. You can use a dividers for the circles, but circles drawn freehand are usually sufficient for animal drawings. Otherwise they quickly look too artificial.
Welcome to our magical unicorn drawing tutorial! Whether you’re a child or a beginner artist, this tutorial is designed to guide you through the enchanting process of drawing a unicorn in just 7 easy steps. With two levels of difficulty, even the youngest artists can enjoy creating their own mystical creature. We’ll use basic shapes and lines to build the unicorn, making it easy and fun for everyone!
This tutorial is crafted for children aged 8 and up as well as beginners who want to explore their artistic talents. By the end, you’ll have a beautiful unicorn drawing ready to be colored. Grab your pencils, and let’s start bringing your unicorn to life!
What You Will Need
- A4 drawing paper for smooth sketching
- HB pencil for initial outlines
- 2B pencil for adding details
- Kneaded eraser to clean up guidelines
- Colored pencils in pink, blue, green, and yellow for vibrant coloring
- Fine-tip black marker for final outlines

Step 1: Head and muzzle
Begin by sketching two circles to represent the unicorn’s head. Use light pressure with your pencil, as these lines will be guidelines. The larger circle will form the main part of the head, while the smaller, slightly oval circle will become the muzzle.
Tip: Keep your strokes gentle so they are easy to erase later.

Step 2: Hull
Draw two larger circles to establish the unicorn’s torso. These circles will help you mark out where the unicorn’s muscular structure is. Position them slightly overlapping to create a natural flow between the neck and body.
Tip: Using simple shapes helps maintain proportion and balance.

Step 3: Neck, back and tail
Sketch a flowing line from the nose, along the neck, and down the back to outline the unicorn’s elegant posture. Extend this line to form the tail, aiming for a graceful curve.
Tip: A continuous line creates a smooth and natural appearance.

Step 4: Horn and chest
Mark the position for the unicorn’s horn on the head. Complete the torso by connecting the circles and adding an outline for the chest area. Ensure that your horn is centered on the forehead for a balanced look.
Tip: Use light strokes to adjust the horn’s length and angle.

Step 5: Limbs and first permanent contours
Sketch the unicorn’s legs as if it’s in motion, using small circles to indicate joints and lines for the limbs. Draw the hooves and refine the outline of the head, body, and tail lines. Add preliminary details to the unicorn’s face to start bringing it to life.
Tip: Visualize the legs’ movement to achieve a dynamic pose.

Step 6: Mane and other details
Flesh out the legs and face details with your drawing pencil. Add a flowing, magical mane and a tail that reflects the unicorn’s grace. Let your creativity guide the mane’s style.
Tip: Use varying line thickness to give the mane and tail a lively texture.

Step 7: Removing the guides
Carefully erase any remaining guidelines to clean up your drawing. This step will help highlight the unicorn’s final shape and ensure it stands out.
Tip: A kneaded eraser works best for precise erasing without damaging the paper.

Step 8: Coloring
Now it’s time to add color! Use your colored pencils to bring your unicorn to life. Consider adding shading to give it a more three-dimensional look. Experiment with different colors for the mane and tail to make your unicorn unique.
Tip: Blend colors smoothly for a magical effect.
More Template Ideas


Take a picture and send it to show@colomio.com – we publish it on www.colomio.com!
All tutorials and images are copyrighted by happycolorz GmbH. Interested in using it? Please send a mail to info@colomio.com.
Simple unicorn painting


|
||||
|---|---|---|---|---|
| Free Download | ||||
|
|
|
Image file | ||
With the help of this template, you’ll be able to draw a lively unicorn in cartoon style step by step. You’ll need a hard pencil for drawing fine outlines, an eraser, an eraser-proof drawing pencil in a dark color, and a pack of colored pencils. Let’s go!

Step 1: Head and muzzle
Start by drawing two circles next to each other on the paper. The larger circle will be the main part of the unicorn’s head, while the smaller oval will form the nose area. These simple shapes make it easy to get started.
Tip: Keep your pencil strokes light for easy adjustments.

Step 2: Hull
Below the head, draw a larger circle for the chest and a smaller one to the left for the back. These shapes will serve as the foundation for the unicorn’s body. Check the distances to ensure the proportions look right.
Tip: Use the circles as a guide to maintain symmetry.

Step 3: Legs and tail
Draw a gentle curve from the unicorn’s hindquarters to suggest where the tail will go. Use small strokes to outline the legs, paying attention to their position. Refer to the template to check the angles and positions of the limbs.
Tip: Keep practicing these strokes to improve your technique.

Step 4: First permanent contours
Trace the contours of the body with a pencil to make them permanent. Outline the head and nostrils, then connect the head to the torso. Now the unicorn has a belly, back, and neck in place.
Tip: Take your time to ensure smooth and even lines.

Step 5: Final silhouette and face
Add the ears to the unicorn with a few simple strokes. Draw its eyes, nose, and mouth for a full face. Use the guide line to shape the tail and make the legs thicker, ending in small hooves.
Tip: Use reference images to get the facial features just right.

Step 6: Horn, mane and tail
Continue shaping the unicorn by adding a mane with flowing lines, giving the tail more structure. Draw the horn, transforming the horse into a true unicorn. Let your imagination be inspired by the template!
Tip: Feel free to add extra details for a personal touch.

Step 7: Removing the guides
Erase any guide lines gently, using an eraser to clean up your drawing. Your unicorn is nearly complete!
Tip: Be careful not to smudge your final outlines while erasing.

Step 8: Coloring
It’s time to color your unicorn! Use your colored pencils to create a vibrant and magical creature. The template suggests a white horse with a colorful mane, but feel free to choose your colors and make it your own.
Tip: Experiment with different color combinations to discover new looks.
Take a picture and send it to show@colomio.com – we publish it on www.colomio.com!
All tutorials and images are copyrighted by happycolorz GmbH. Interested in using it? Please send a mail to info@colomio.com.
Your Unicorn Drawing Is Complete!
Congratulations on completing your unicorn drawing! We hope you enjoyed the process and are proud of your magical creation. Feel free to explore other tutorials on our site, such as how to draw a dragon or a fairy, to continue your artistic journey. Keep drawing and have fun!
Unicorn Variations: Beyond the Standard White Unicorn
The same body plan adapts to dozens of unicorn archetypes:
- Classic mythical unicorn: Pure white horse with a long spiral horn, flowing mane and tail, blue or purple eyes. The traditional fairy-tale unicorn.
- Pastel rainbow unicorn: White body with soft rainbow-colored mane and tail (pink, purple, blue, mint, yellow), gold horn, sparkly eyes. The Lisa Frank / modern Instagram look.
- Pegacorn / Alicorn: Unicorn WITH wings – combining the unicorn’s horn with the pegasus’s wings. The most powerful magical creature.
- Black unicorn: Pure black or deep midnight-blue body, glowing silver mane and horn, glowing red or violet eyes. Mysterious and elegant. Often shown as the leader of dark forests.
- Forest unicorn: Deep green-tinged body with leaves and flowers in the mane, antler-like branches at the base of the horn, earthy palette. Druidic.
- Crystal / ice unicorn: Pale blue or translucent body with crystalline texture, frosted mane, ice-blue horn. Ethereal and cool.
- Sun unicorn: Golden body with flame-colored mane, sun-disc on the forehead, fiery aura. Warm and powerful.
- Sea unicorn / aquacorn: Pale blue-green body, fish-scale patterns on the legs, flowing seaweed-like mane, tail ending in a dolphin fin instead of hair.
- Baby unicorn (foal): Smaller body with proportionally bigger head and oversized eyes, tiny horn, wobbly legs, fluffy mane. Universal cuteness.
- Cartoon unicorn: Round friendly proportions, oversized eyes with sparkles, bright pastel colors, pink cheeks, big smile. Pure children’s book magic.
- Skeletal / undead unicorn: Bare bones with tattered ghostly mane, glowing eye sockets, dark horn. Halloween or dark fantasy.
- Cyberpunk unicorn: Holographic shimmer body, neon-colored mane, glowing geometric horn, futuristic patterns. Modern fantasy.
The Horn: The Most Important Detail
The horn is what separates a unicorn from a horse, and there’s more to it than most beginners think:
- Spiral pattern: Real mythological unicorn horns have a clear corkscrew spiral running along the length. Add 4–6 visible spiral grooves – never just a smooth cone.
- Position: The horn emerges from the center of the forehead, between and slightly above the eyes. Too high looks like a unicorn from another species; too low looks like a rhino.
- Length: The horn should be at least as long as the head – often longer. Short horns look weak and undersized.
- Tilt: The horn points slightly forward, not straight up. A vertical horn looks rigid; a forward-tilted horn looks confident.
- Tip: Sharp pointed tip. Some artistic styles add a small glow or sparkle at the tip to suggest magical energy.
- Color: Classic horns are pearly white or ivory; magical horns can be gold, silver, rainbow-iridescent, glass-clear, or glowing.
- Base detail: Where the horn meets the head, add a small ring of fluffy hair or a slight color transition. Helps the horn look attached, not glued on.
Mane & Tail: The Flowing Magic
Unicorn manes and tails should always look like they’re moving, even when the unicorn is standing still:
- Use long flowing S-curves, never straight lines. Each lock should bend at least twice.
- Show multiple visible strands – never a solid block of color. Suggest individual locks crossing over each other.
- Add floating wisps at the edges – never a tidy outline.
- For rainbow manes, blend colors smoothly through transitions rather than sharp blocks – this looks magical, not striped.
- The tail should reach almost to the ground in a graceful flowing curve.
- Add sparkles or stars woven into the mane and tail for extra magical energy.
- The mane should run from between the ears down the entire neck, often falling to one side asymmetrically. Symmetric center parts look too tidy.
- For fantasy variants, mane and tail can include flowers, ribbons, glowing strands, or even fire/water effects.
Magic Effects to Make It Magical
What separates a unicorn from a horse-with-a-horn is the visible magic:
- Sparkles around the body: Tiny stars, dots, and four-point sparkles scattered around the unicorn. Vary the sizes for energy.
- Glowing horn: Soft halo of light around the horn tip, brightest at the very point.
- Rainbow trail: A bright rainbow streaming behind the unicorn as it runs or flies. Pure magic.
- Pixie dust footprints: Each hoofprint leaves a small glowing patch on the ground that fades.
- Mane that glows from within: Subtle gradient making the mane look luminous, especially at the tips.
- Horn projecting energy: A small beam, orb, or burst of light coming from the horn tip. Storybook magic in action.
- Floating crystals or stars: Small magical objects orbiting around the unicorn at different distances.
- Aura outline: A soft glowing edge around the entire silhouette, suggesting otherworldly energy.
- Hoof glow: Each hoof emanating a small ring of light, especially in flying poses.
Magical Scenes & Compositions
- Enchanted forest: Unicorn standing in a magical forest with glowing mushrooms, fireflies, and tall ancient trees. Beams of light filtering through. Pure storybook.
- On a rainbow: Unicorn galloping along a vivid rainbow that arcs across the sky. Maximum magic.
- Castle in the clouds: Unicorn flying past a fairy-tale castle floating in pink clouds. Adventure mode.
- Princess and unicorn: Princess sitting beside or riding the unicorn, both looking at a sunset. Classic fairy-tale duo.
- Unicorn and rainbow waterfall: Unicorn drinking from a glowing pool with a rainbow waterfall behind. Lush and magical.
- Galaxy unicorn in space: Cosmic background with stars, planets, and a galaxy swirl. Unicorn made of stardust.
- Unicorn meeting a child: Small kid kneeling in a meadow with a unicorn lowering its head to be petted. Tender and magical.
- Unicorn family: Adult unicorn with a smaller foal at her side, both grazing in a meadow. Heartwarming.
- Galloping through flower fields: Unicorn mid-stride across a meadow of wildflowers, mane streaming behind, butterflies disturbed by the motion.
- Unicorn under the moon: Silhouette against a full moon at night, stars scattered in the sky, mystical atmosphere.
- Pegacorn flying through the clouds: Wings extended, mane and tail streaming, sun behind. Maximum drama.
- Unicorn in a crystal cave: Standing in a cavern lit by glowing crystal formations, magical and mysterious.
Color Palettes for Different Unicorns
- Classic mythical white: Pure white body with subtle pale-blue shadows, flowing white-and-silver mane, golden horn, large violet eyes, gold hooves.
- Rainbow pastel: White body, mane in pink-purple-blue-mint-yellow gradient, gold horn with sparkles, big sky-blue eyes with stars. Lisa Frank dreams.
- Sunset coral: Cream body, peach-and-coral mane, gold horn, warm copper hooves, pink-tinged sky behind.
- Forest emerald: Pale moss-green body, dark green mane with leaves, antler-base horn, hazel eyes, woodsy palette.
- Black mystic: Pure obsidian-black body, silver-glowing mane, glowing white horn, glowing violet eyes. Powerful and mysterious.
- Ice crystal: Pale ice-blue body with white highlights, snowflake-patterned mane, translucent horn, crystal-blue eyes.
- Storybook bright: Pure white body, bright pink mane and tail, gold horn, big sparkly purple eyes, pink hooves. Children’s book gold.
- Galaxy cosmic: Deep purple-and-blue body with stars and nebulae visible inside the silhouette, glowing mane, silver horn. Otherworldly.
- Vintage botanical: Soft cream body, sage-green mane, antique-gold horn, parchment background. Old fairy-tale book aesthetic.
Pose Variations
- Rearing up: Standing on hind legs with front legs extended forward, mane and tail flying. Powerful and dramatic.
- Galloping: All four legs extended in motion, body horizontal, mane streaming. Captures speed and grace.
- Grazing peacefully: Head down to the grass, body relaxed, mane falling forward. Quiet and serene.
- Looking back over shoulder: Body forward, head turned back to look at viewer with expressive eyes. Storybook charm.
- Lying down: Body folded, legs tucked under, head held high. Peaceful and noble.
- Flying / pegacorn: Wings extended fully, body angled upward, mane and tail streaming. Maximum magic.
- Drinking from a pond: Head lowered to water, mane reflecting in the surface. Quiet moment.
- Mother and foal: Adult unicorn standing protectively beside a smaller foal. Heartwarming family dynamic.
Common Mistakes to Avoid
1. The horn is in the wrong place. The horn must emerge from the center of the forehead between the eyes. Too high or too low ruins the silhouette.
2. The horn is a smooth cone. Real mythological unicorn horns have visible spiral grooves. A smooth cone looks like a party hat.
3. The mane and tail look static. Unicorn manes should always have movement, even when the unicorn is standing still. Stiff hair kills the magic.
4. No magic effects. Without sparkles, glow, or some visible magical energy, the unicorn reads as a horse with a fake horn. Add at least some hint of magic.
5. Generic horse proportions. Unicorns often have slightly more delicate proportions than real horses – smaller heads, slimmer legs, longer manes. Pure realism reads as “pony with a horn.”
6. Symmetric perfect pose. Real animals are rarely perfectly symmetric. Add a tilt of the head, asymmetric ears, one leg slightly forward.
7. The eyes are too small. Magical creatures benefit from large, expressive eyes. Realistic horse eyes can look too plain.
8. Forgetting the cloven hooves debate. Classical mythology depicts unicorns with cloven hooves (like a goat’s) and a goat’s beard. Modern unicorns usually have horse hooves. Pick one tradition and stick with it.
9. The rainbow is a flat band. If you draw a rainbow, blend the colors and add transparent edges. A solid striped block looks like a flag, not magic.
10. The horn has no glow at the base. A faint shadow ring or fluffy hair where the horn meets the head makes it look attached, not glued on.
Frequently Asked Questions About Drawing a Unicorn
What type of paper is best for drawing a unicorn?
A4 drawing paper is recommended as it provides a smooth surface ideal for both sketching and coloring.
How can I make my unicorn drawing more realistic?
To achieve a realistic look, focus on adding shading with your colored pencils and pay attention to the details, such as the mane and facial features.
Can I use markers instead of colored pencils?
Yes, you can use markers, but be mindful of their boldness. Colored pencils offer more control for shading and blending.
What is the best way to draw the unicorn’s mane?
Use flowing lines with varying thickness to give the mane a natural and lively appearance. Let your creativity guide the style of the mane.
How do I fix mistakes while drawing?
Use a kneaded eraser to gently remove errors without damaging the paper. Light pencil lines are easier to correct.
More ideas for drawing
-

Airplane drawing -

Plane drawing easy -

Apple drawing -

Bicycle drawing -

Ship drawing -

Car drawing -

Car drawing easy -

Cat drawing -

Cow drawing -

Dinosaur drawing -

Dog drawing -

Puppy drawing -

Dragon drawing -

Digger drawing -

Fairy drawing -

Giraffe drawing -

Lion drawing -

Mermaid drawing -

Moon drawing -

Motorcyle drawing -

Penguin drawing -

Pig zeichnen (einfach) -

Princess drawing -

Reindeer drawing -

Rooster drawing -

Santa Claus drawing -

Shark drawing -

Sheep drawing -

Strawberry drawing -

Sunflower drawing -

Tiger drawing -

Tractor drawing -

Train drawing -

Tree drawing -

Tree drawing easy -

Tulip drawing -

Turtle drawing -
Unicorn drawing -
Unicorn drawing easy -

Witch drawing
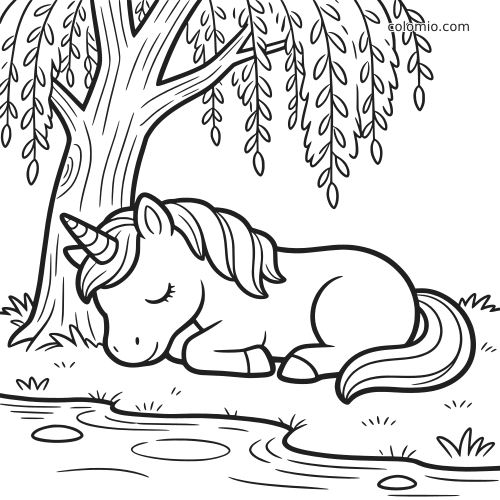
Print our free printable unicorn coloring pages — ready-to-print line art, no signup.
More Crafting Ideas
-

Bee craft -

How to Make a Paper Boat -

How to make an envelope -

Ladybug Craft -

Origami Boat -

Butterfly Craft


